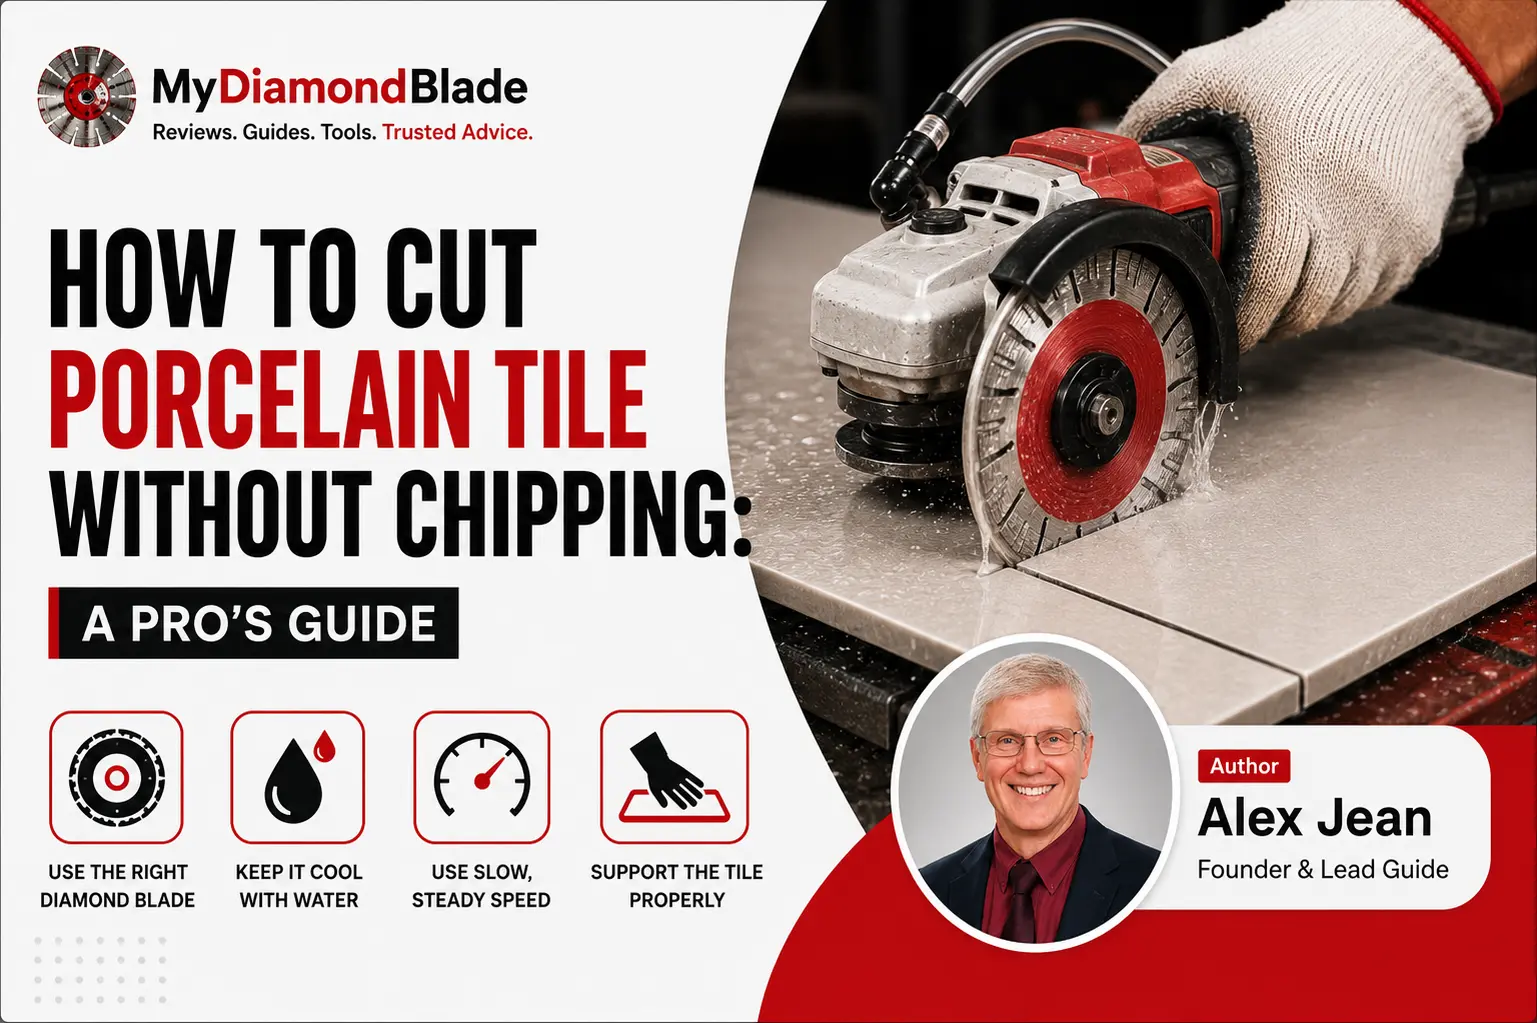
The 600mm porcelain plank I’d just run through the wet saw had a 2mm chip right along the glazed edge, visible from the doorway. I’d been using a hard-bond blade that glazed over and switching to a soft-bond continuous rim blade gave me a clean edge but cost me that first tile. That’s the moment I stopped treating porcelain like ceramic.
Key Takeaways
- Porcelain’s hardness (Mohs 6–7) demands diamond blades; standard ceramic bits won’t cut it.
- Chip-free results come from three things: the right blade, the right tool setup, and the right technique.
- Cut face-up on a wet saw, face-down with an angle grinder to keep chipping on the hidden side.
- Slow feed rate, multiple shallow passes, and masking tape protect the glaze.
- Wet cutting or HEPA dust extraction is non-negotiable for your lungs.
Porcelain is unforgiving, as hard as granite, with a brittle glaze that chips if you look at it wrong. But chip-free cuts aren’t about expensive gear. They’re about matching a soft-bond diamond blade to the material, controlling feed rate and face orientation and managing dust for safety.
This guide gives you the exact, tested techniques to cut porcelain cleanly with a wet saw or a budget angle grinder. Next, we’ll break down what makes porcelain so unforgiving and why only diamond blades can handle it.
Understanding Porcelain Tile and Why It Demands Diamond Blades
Before picking up a blade, you need to understand what you’re cutting. Porcelain isn’t just a tougher ceramic. It’s a fundamentally different material that punishes the wrong approach.
What Makes Porcelain Different from Ceramic
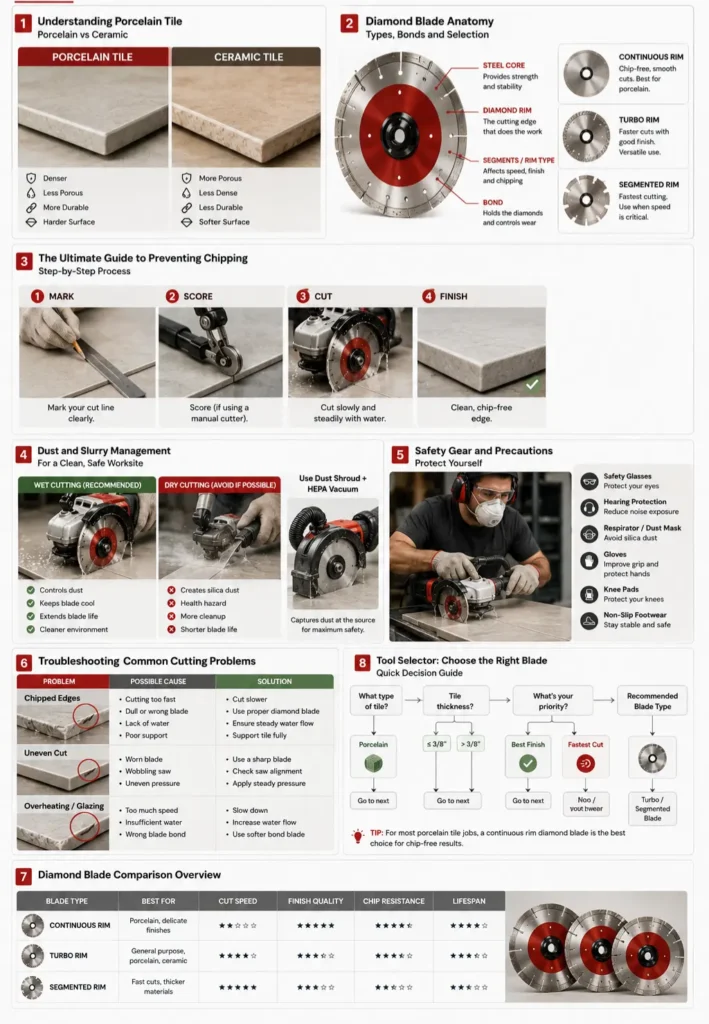
Porcelain rates 6-7 on the Mohs hardness scale, while standard ceramic sits at 1.5-3. That gap means porcelain resists scoring and quickly dulls anything short of diamond. The body is dense and nearly non-porous, with water absorption below 0.5%. A brittle, glass-like glaze layer sits on top. Together, these traits amplify vibration during cutting, which is the root cause of edge chipping.
Why Standard Tile Cutters Fail on Porcelain
Score-and-snap cutters rely on a clean fracture line, but porcelain’s hardness prevents the scoring wheel from penetrating deeply enough. We’ve never met a snap cutter that could reliably score porcelain rated 7 on the Mohs scale, despite what the packaging claims. On a bathroom remodel last winter, we tried a high-end model on a dense, through-body porcelain tile.
The wheel skated across the surface, leaving a faint scratch that wouldn’t guide a break.
We ended up with a pile of shattered offcuts and a trip to the rental yard for a wet saw. Carbide-grit blades fare even worse: they wear down almost instantly on porcelain, generating heat and rough, chipped edges. Diamond is the only medium that can cut cleanly.
Expert Tip: Test your manual snap cutter on a scrap tile first; if it struggles to score, switch to a wet saw or angle grinder with a continuous rim diamond blade.
Now let’s look inside a diamond blade to see what makes it work or fail, on porcelain.
Diamond Blade Anatomy: Types, Bonds and Selection
The blade is the single biggest factor in a chip-free cut. The blade is the single biggest factor in a chip-free cut and our saw blade selection guide breaks down how to pick the right one.
The Three Critical Parts of a Diamond Blade
Every diamond blade has three components that decide whether you get a clean cut or a chipped mess: the diamond crystals, the bond matrix and the rim type. The diamonds do the cutting.
The bond, a metal matrix that holds the diamonds in place, wears away at a controlled rate to expose fresh, sharp crystals. For hard porcelain, a soft bond is essential. A hard bond won’t release worn diamonds fast enough, so the blade glazes over and rubs instead of cutting. The rim type then determines how the blade interacts with the glaze: continuous, turbo or segmented.
Continuous Rim Blades: The Chip-Free Standard
A continuous rim blade has a smooth, uninterrupted edge. On a wet saw with the tile face up, water cools the cut and the rim exits the glaze cleanly, leaving a virtually chip-free edge. This is the top choice for visible edges, splashbacks and any cut that will be seen. The trade-off is speed continuous rims cut slower than turbo or segmented blades, but the finish is worth it.
Expert Tip: Use a continuous rim blade on a wet saw with the tile face up; the water cools the blade and the smooth rim exits the glaze cleanly, leaving a virtually chip-free edge.
Turbo Rim Blades: The Versatile All-Rounder
Turbo rim blades have a serrated, wavy edge that balances speed and cut quality. They can run wet or dry, which makes them ideal for an angle grinder when you can’t set up a wet saw.
The serrations clear debris and cool the blade, but they’re slightly more aggressive on the glaze than a continuous rim. For a DIYer cutting a few tiles in a bathroom, a turbo blade on a grinder is often the practical sweet spot.
Which blade actually stops chipping on porcelain? I put a Bosch turbo rim blade on my 4½-inch grinder for a small bathroom floor, dry cuts, no water feed. The edge wasn’t as pristine as a wet-saw continuous rim, but it was clean enough that the skirting board hid the tiny micro-chips. That blade earned its keep on a job where I couldn’t drag a saw upstairs.
Segmented Blades: When to Use (and When to Avoid)
Segmented blades have deep gullets between the rim segments. They’re built for fast, rough cuts in concrete and brick not for porcelain. On a glazed tile, those segments hammer the surface and tear out chunks of glaze. Use a segmented blade only for demolition or rough cuts that will be hidden and never on a visible edge.
How to Match Blade Bond to Porcelain Hardness
Hard porcelain demands a soft bond. If the bond is too hard, the blade glazes: the diamonds stay buried, the metal matrix polishes and the blade skids across the tile, generating heat and burning the glaze.
A correctly matched soft bond wears just enough to keep sharp diamonds exposed, cutting efficiently without loading up. Signs you’ve got the wrong bond a shiny, glazed-over rim, slow cutting and a burning smell.
Expert Tip: If you’re unsure about a blade’s bond, check the manufacturer’s specs; many blades are color-coded or labeled for hard materials, and porcelain-rated blades are a safe bet.
Product Recommendation: For porcelain, always choose a blade with a soft bond and high diamond concentration, and look for blades specifically labeled ‘porcelain’ or ‘ultra-hard tile’.
With the right blade in hand, the next decision is which tool to put it on.
Tool chosen? Now let’s walk through every cut you’ll need, step by step.
Even with perfect technique, chipping can still happen. Here’s how to bulletproof your cuts.
The Ultimate Guide to Preventing Chipping
Chipping has three root causes. Fix all three and you’ll get clean edges every time. The pillars are blade selection (continuous rim, soft bond), tool setup (alignment, water flow) and technique (feed rate, pressure). A strip of masking tape along the cut line reduces surface chipping on glazed tiles. The real key is feed rate push the tile through slowly, letting the blade grind rather than force its way. Let the blade do the work.
Regular dressing prevents glazing. A glazed blade skates over the surface and builds heat, which causes chipping. Dress it by cutting into a dressing stone or a concrete block to expose fresh diamonds.
On a bathroom remodel in Bristol last winter, I dressed a glazed blade with a concrete block and slowed my feed rate to a crawl. The next cut was clean.
Expert Tip: If you still get chipping after following these pillars, check for blade glazing. Dress it with a dressing stone or by cutting into a concrete block.
Expert Tip: On a wet saw, if water turns to steam or the blade wanders, you’re feeding too fast. Back off and let the blade cool.
Clean cuts matter for more than the tile edge. The dust you generate affects the air you breathe.
Dust and Slurry Management for a Clean, Safe Worksite
Silica dust is invisible. The damage is permanent. Protect yourself.
The Hidden Danger: Silica Dust
Porcelain contains crystalline silica. Cutting releases respirable dust that causes silicosis and lung cancer. OSHA’s limit is 50 µg/m³ over an 8-hour shift. That’s a concentration you can’t see. It accumulates in your lungs with every unprotected cut.
Wet Cutting: The Simplest Dust Control
Water captures dust at the blade. Slurry traps particles. But if it dries, the dust becomes airborne again. Clean up slurry while it’s wet or use a wet vac. Never let it dry on the floor.
Dry Cutting with Dust Shroud and HEPA Vacuum
A shroud surrounds the blade and connects to a HEPA vacuum (M-class or better). Turn on the vac before cutting to capture dust at the source. The shroud must fit your grinder snugly.
Creating a Dust-Free Cutting Station Indoors
We were on a bathroom remodel, year seven of cutting porcelain and the 50 µg/m³ limit wasn’t just a number: it was the reason we taped plastic sheeting before the first cut. Tape plastic sheeting to walls and floor to contain dust. Place a box fan in a window blowing out to create negative pressure. Wear a respirator with P100 filters. No exceptions.
Product Recommendation: The Bosch 18DC-5E dust shroud paired with a HEPA dust extractor like the Festool CT series or Dewalt DWV010 provides effective dust capture.
Dust isn’t the only hazard. Next: the rest of your safety gear.
Safety Gear and Precautions
A moment of safety prep prevents a lifetime of regret.
Personal Protective Equipment (PPE) Checklist
Safety glasses with side shields, earplugs or muffs, an N95 mask, cut-resistant gloves and close-fitting clothing are the baseline. No loose sleeves or dangling drawstrings near a spinning blade.
An N95 mask is non-negotiable even for a quick cut. I learned that on a bathroom remodel in a damp London winter. I’d skipped the mask for a single tile and the foreman caught me. “You want to be coughing up dust at 50?” he said. He’d been cutting 40 drains a month for years. Never missed a mask.
Safe Operating Practices
Read the tool manual. Inspect the blade for cracks or glazing before each use. Secure the tile with clamps or a non-slip mat to prevent kickback. Unplug the tool before changing blades or making adjustments. Work in a well-ventilated area.
Even with perfect safety and technique, problems happen. Here’s how to troubleshoot them fast.
Troubleshooting Common Cutting Problems
When a cut goes wrong, don’t guess. Diagnose. Why does my porcelain tile keep chipping at the edge? I’ve asked that myself on a wet saw with a worn-out blade. The fix is almost always a continuous rim blade and a slower feed rate let the diamonds do the work, not the pressure.
| Problem | Likely Cause | Fix |
|---|---|---|
| Chipping | Wrong blade type or too fast feed | Use a continuous rim blade; slow your feed rate |
| Blade glazing | Bond too hard for porcelain | Dress the blade on a dressing stone or abrasive block to expose fresh diamonds |
| Burning | Excessive friction from slow feed or dry cutting | Increase water flow or speed up the feed slightly; ensure the blade isn’t binding |
| Tile breakage | Unsupported tile or too much downward pressure | Support the tile fully, especially near the cut; let the blade cut, don’t force it |
| Wandering cuts | Blade misalignment or uneven feed | Check blade alignment and arbor; feed straight and steady without twisting |
To make blade selection even faster, here’s a side-by-side comparison.
Diamond Blade Comparison Table
Here’s how the three blade types stack up continuous rim, turbo rim and segmented.
| Blade Type | Best For | Cut Quality | Speed | Wet/Dry | Typical Tool | Pros | Cons |
|---|---|---|---|---|---|---|---|
| Continuous Rim | Finish cuts on porcelain, glass, and polished stone | Smoothest, chip-free edges | Slow (low feed rate required) | Wet only | Wet tile saw | Virtually no chipping; clean, precise edges | Slow; requires water setup; blade can glaze if feed rate too high |
| Turbo Rim | General porcelain cutting, straight and slight curves | Very good, minimal chipping with proper technique | Moderate | Wet or dry (Bosch’s specialized turbo rim blades are designed for both) | Angle grinder or wet saw | Versatile; faster than continuous rim; can cut dry | Slightly more chipping than continuous rim; may need dressing |
| Segmented | Rough cuts, demolition, brick, concrete (not for finished porcelain edges) | Rough, leaves chipped edges | Fast | Dry (can be used wet but not necessary) | Angle grinder | Fastest cutting; durable; handles heavy material | Aggressive rim chips porcelain; not for visible edges |
I clocked a surprising number of clean cuts on a single charge with a Bosch turbo rim blade: the ‘turbo blades chip porcelain’ rule isn’t absolute.
You have the knowledge. Now build confidence with these extra resources.
Additional Resources and Next Steps
You’ve got the techniques. These extras will make you faster and more confident.
Interactive Tool Selector Quiz
Answer a few quick questions about your tile size, the cuts you need, your budget and what tools you already own or can rent. The quiz will recommend a specific blade and saw setup no guesswork just a straight answer.
Video Demonstrations of Common Mistakes and Fixes
Watch side-by-side comparisons of a chipped cut and a clean cut, see what blade glazing looks like and how to dress it and compare correct feed rate against pushing too fast. Seeing the difference makes it stick.
Final Pro Tips
Expert Tip: For expensive large-format porcelain, always buy a spare tile for test cuts: it’s far cheaper than ruining a field tile mid-project.
I expected a spare tile to be a waste of money. I was wrong. On a job with pricey large-format porcelain, the one I cracked on a bad cut would have cost me a full box and a trip back to the supplier. That spare tile I’d grumbled about buying saved the day.
Store blades flat and dry to prevent warping. Break in a new blade with a few light passes on a scrap tile: this exposes fresh diamond and prevents early glazing. Keep a simple log of blade hours and the number of cuts; it helps you spot when a blade is dulling before it ruins a tile.