Mid-cut through a concrete curb, the diamond blade went smooth and silent while the motor screamed; I nearly blamed my feed pressure, then swapped to a softer bond and watched it bite clean through. That stalled blade cost me the cut, the afternoon and a diamond segment I nearly threw away for no reason. The tool was fine. The match between tool and material was wrong.
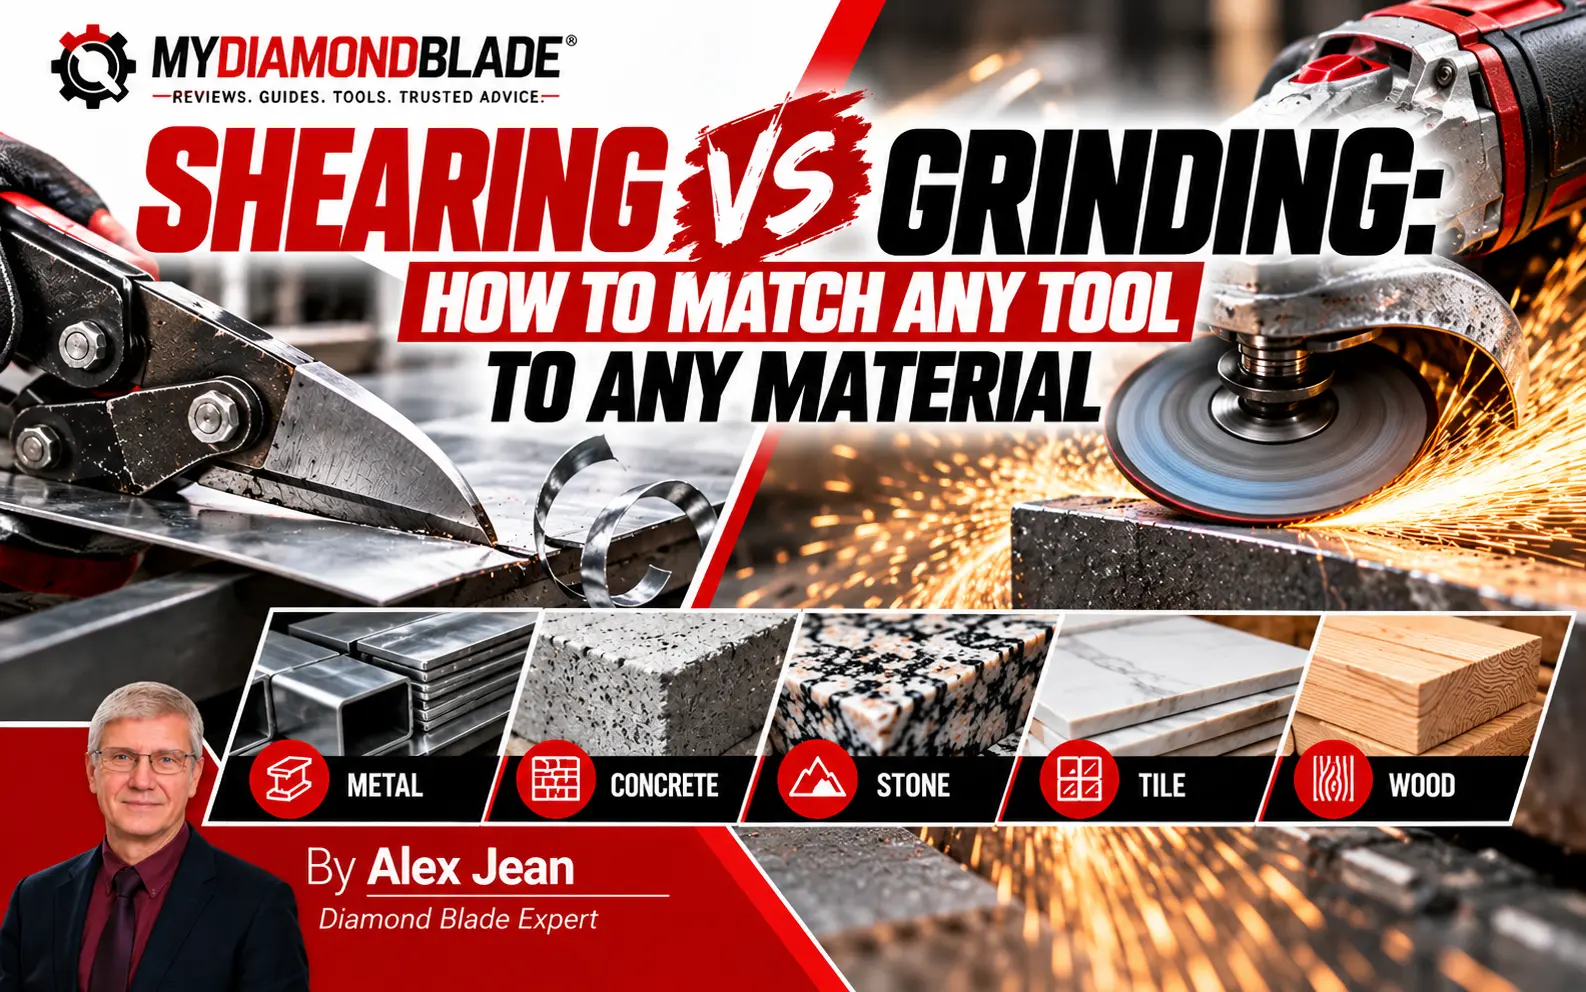
Burning, tear-out, glazing and cracking are almost never technique problems. They are tool-to-material mismatches. Learn to read a material’s four properties, hardness, abrasiveness, brittleness, and heat behavior and you pick the cutting mechanism that matches how it fails. No more guessing.
This is the master framework the rest of these guides hang from. Every specific guide on this site is one case of a single idea: the material chooses the tool.
Key Takeaways
- Every cutting and abrasive tool works by one of two mechanisms: shearing (toothed blades) or grinding (abrasives). Pick the mechanism that matches how the material fails.
- Burning, tear-out, glazing, and cracking are almost never technique problems. They are tool-to-material mismatches.
- Four material properties decide every tool choice: hardness, abrasiveness, brittleness, and heat behavior.
- The diamond bond rule is backwards on purpose: hard, dense material needs a soft bond; abrasive material needs a hard bond.
- Match the tool to the material first, then match the machine (power source, RPM) to the job. Never the other way around.
The whole page rests on one distinction. That distinction comes next.
The Two Ways Tools Cut: Shearing vs. Grinding
Everything on this page rests on one distinction, so it comes first.
A toothed blade shears. The teeth lean into the work, slice out chips, and separate the material. An abrasive wheel grinds: grit wears the surface away particle by particle. Same workpiece, two completely different events.
The mechanism, not the brand or the price, predicts what you get: edge quality, heat, speed, tool life. A carbide-tipped saw blade shears aluminum into clean chips. A diamond blade grinds granite down a fraction of a millimeter at a time.
| Mechanism | How it works | Tools that use it | Best for | Edge quality | Heat generation |
|---|---|---|---|---|---|
| Shearing | Toothed blades slice and separate material into chips | Carbide-tipped saw blades, circular saw blades, metal shears | Aluminum, wood, flat metal stock | Clean, crisp edges; no chip waste | Lower; chips carry heat away from the cut |
| Grinding | Abrasive wheels wear material away particle by particle | Diamond blades, grinding wheels, cup wheels | Granite, concrete, hard brittle stone | Rougher, abraded surface | Higher; friction builds heat, so dry cutting needs the blade to spin freely in the air every 30 seconds |
Tool life is where the mechanism shows its hand first. Nobody reads the arrow on a diamond blade until it costs them a morning. A bricklayer I worked alongside on a patio job fitted a new blade backwards and pushed it into a granite slab.
The diamonds buried into the bond instead of standing proud, the rim glazed over, and the blade stopped cutting while the motor screamed. He blamed the blade. The marketing never mentions that the arrow exists so the bond wears at a controlled rate and exposes fresh diamond.
That is the real differentiator, and you only learn it by watching a blade die. That mistake is why I now check the arrow before every dry cut. The brand matters less than the bond does.
The material’s failure mode picks the mechanism. The operator only matches it. Once you know the mechanism, the next step is reading the material that chose it.
How to Read a Material: The Four Properties That Decide Your Tool
Knowing whether a tool shears or grinds is only half the decision. The other half is the material in front of you, and it speaks through four properties: hardness, abrasiveness, brittleness, and heat behavior. Read them wrong and you buy the wrong blade. Read them right and the tool picks itself.
Hardness is resistance to penetration. Abrasiveness is how fast a material wears away abrasive grit. Confusing the two is the root of most mismatches. Quartzite is both hard and abrasive. Green concrete is the trap that proves the distinction: soft, yet highly abrasive.
Granite versus green concrete is the worked example worth memorizing. Granite is the harder material. Green concrete is the more abrasive one.
The sand and uncured paste in green concrete grind away diamond grit faster than granite’s polished face ever will, so the tool choice flips. Granite demands a blade that resists wear and holds its edge.
Green concrete demands a blade that wears fast enough to stay sharp, because the material grinds the modern away with every pass. Same tool family, opposite build.
Brittleness decides whether the cut chips, shatters, or shears cleanly. Porcelain and glass shatter under a toothed blade’s impact. Aluminum galls and welds to teeth instead of chipping. The mechanism has to match the failure mode: brittle materials want grinding, ductile materials want shearing.
Heat behavior decides whether the tool needs cooling, dry cutting, or a slower feed. Stainless steel work-hardens and holds heat; push it fast and dry and the blade glazes over. Porcelain and glass need wet cutting to stop thermal shock from cracking the tile before the blade finishes the line.
Every mismatch traces back to misreading one of these four properties. A burned cut is a heat-behavior misread. A chipped edge is a brittleness misread. A blade that dulls in green concrete is an abrasiveness misread; the blade itself was fine.
Why does a blade rated for granite die in a morning of green concrete? Because the rating names hardness, and the material punishes abrasiveness. I have watched the same pattern repeat on driveways and footings: a contractor buys the blade the box says is for hard stone, runs it into fresh green concrete, and the edge is gone by lunch.
The concrete is soft, and it is hungry. The sand and uncured paste grind the grit away, and the blade polishes smooth and stops cutting. The manufacturer’s claim was true for granite. The material in front of them was never granite. That is the whole lesson of this section: name the property the material actually punishes, and forget the one the label assumes.
Expert Tip: Ask one question before you pick a tool: ‘Is this material more likely to melt, tear, shatter, or wear my tool down?’ The answer names the dominant property, and that property names the tool type.
The table below maps the four properties against the materials you will actually meet.
| Material | Hardness | Abrasiveness | Brittleness | Heat behavior | Typical tool |
|---|---|---|---|---|---|
| Softwood | Low | Low | Low; tears rather than shatters | Low heat; resin can gum teeth | Toothed blade, low tooth count |
| Hardwood | Moderate | Low to moderate | Low to moderate | Moderate; burns if feed too slow | Toothed blade, high tooth count |
| Plywood / MDF | Low to moderate | Moderate; glues and resins wear teeth | Low; splinters and tears | Moderate; resins soften and melt | Toothed blade, fine teeth |
| Aluminum | Low to moderate | Low | Ductile; galls rather than chips | High; melts and welds to teeth | Carbide-tipped blade, negative hook |
| Mild steel | Moderate | Low | Ductile | High; work-hardens | Toothed metal blade or abrasive disc |
| Stainless steel | High | Low | Ductile; work-hardens fast | Very high; holds heat | Abrasive disc or slow toothed blade |
| Cured concrete | Moderate to high | High; sand and aggregate | High; chips and spalls | Moderate; dust carries heat | Diamond blade |
| Green concrete | Low to moderate | Very high; sand, uncured paste | Low to moderate | Low to moderate; usually cut wet | Diamond blade, soft bond |
| Granite | High | High; quartz content | High; chips at edges | Moderate; needs wet or slow dry | Diamond blade |
| Quartzite | Very high | Very high; almost pure quartz | High; shatters | High; needs wet cutting | Diamond blade |
| Porcelain | Very high | High | Very high; chips easily | High; needs wet | Diamond blade, continuous rim |
| Glass | High | Low to moderate | Very high; shatters | Low to moderate; thermal shock risk | Diamond blade, continuous rim, wet |
Wood shears. The question is how cleanly, and that comes down to three variables on the blade: tooth geometry, tooth count, and hook angle.
Toothed Blades for Wood: Geometry, Count, and Hook Angle
For wood, the mechanism is shearing: toothed blades cut chips out of the material. Three variables control that shear. Most woodworkers own a stack of blades and still guess, because nobody taught them to read the three together.
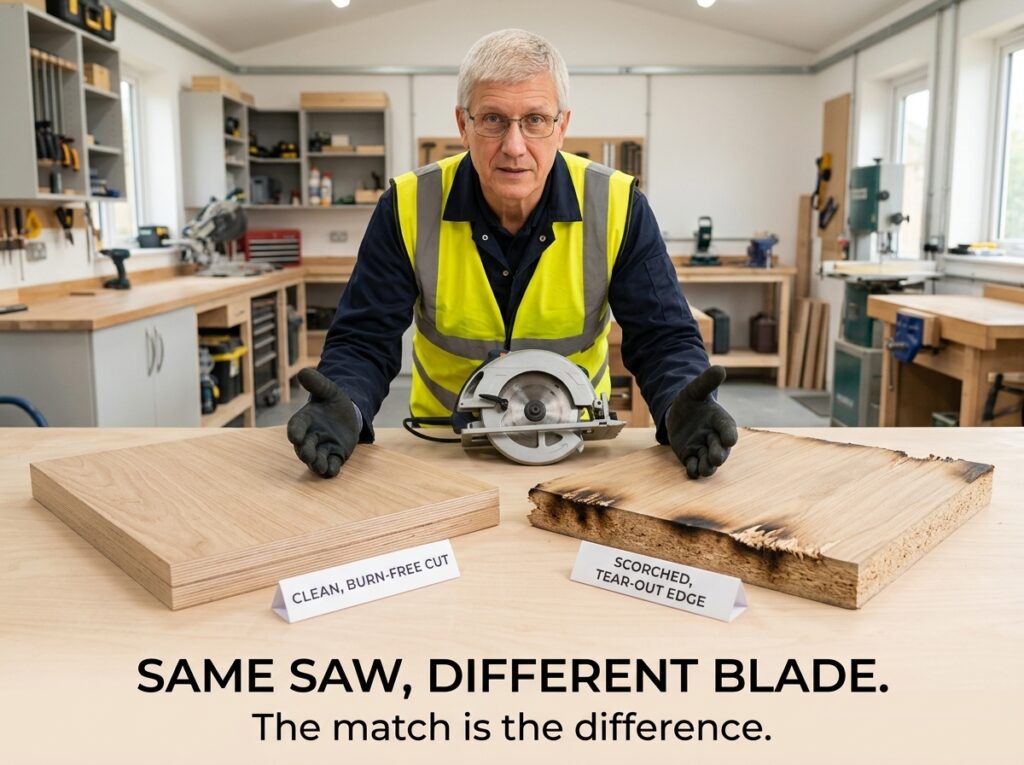
The scorched maple panel is the giveaway. An 80-tooth crosscut blade burning maple is a geometry mismatch, and sharpening will not fix it. 80 teeth on the ATB crosscut blade left a scorch line I could smell before I saw it; 24 teeth on the FTG ripper glided through the same maple with no burn and half the feed pressure. Tooth count mattered, but the grind was the decision.
Geometry is the first lever.
Tooth Geometry: ATB, FTG, TCG, and Combination Grinds
The four grinds are four answers to one question: how should the tooth enter the material?
ATB, alternate top bevel, enters like a knife. The alternating bevels score the wood fibers on both sides of the cut before the tooth body clears the chip. That scoring gives a clean crosscut with minimal tear-out. It is also why an ATB blade burns when you ask it to rip: the knife edge has nowhere to dump heat on a long, thick cut.
FTG, flat-top grind, enters like a chisel. The square, flat tooth drives straight into the grain and rips aggressively. The 24-tooth FTG ripper that glided through the maple did so because the chisel shape clears material fast enough to stay cool.
TCG, triple-chip grind, pairs a trapezoid tooth with a flat raker. The trapezoid scores first, then the raker clears the scored material. That two-step entry is why TCG survives abrasive and brittle materials and aluminum: the scoring tooth takes the abuse, and the raker keeps the kerf clean.
Combination grind, ATB plus a flat raker, balances the two. Groups of ATB teeth score for a clean edge, and the raker clears for speed. It is the compromise blade for mixed rip and crosscut work, and like most compromises it does neither job as well as a dedicated grind.
| Grind | Tooth shape | How it cuts | Best for | Avoid for |
|---|---|---|---|---|
| FTG | Flat-top square teeth | Chisels straight through the grain, aggressive chip removal | Fast ripping, thick stock | Clean crosscuts, veneer |
| ATB | Alternating bevels | Scores fibers like a knife before clearing the chip | Clean crosscuts, general wood | Heavy ripping, where it overheats |
| Hi-ATB | Steep alternating bevels | Slices with minimal tear-out | Veneer, melamine, laminates | Thick ripping, abrasive materials |
| TCG | Trapezoid tooth plus raker | Scores with the trapezoid, clears with the raker | Abrasive and brittle materials, aluminum | Fine veneer finish |
| Combination (ATB+R) | Alternating bevels plus flat raker | Balances scoring and clearing | Mixed rip and crosscut work | Specialized single-task cuts |
There is no universal blade. Choosing a tooth grind is really choosing how the tooth enters the material.
Tooth Count, Hook Angle, and Blade Anatomy
Tooth count fine-tunes the geometry decision. More teeth mean more scoring edges and a cleaner crosscut, which is why thin stock wants a high count. Fewer teeth mean bigger gullets and faster chip clearance, which is why thick ripping wants a low one.
The 3-teeth rule sets the baseline: at least three teeth should be in contact with the material at all times for safety and cut quality. Thin stock, small blades, and non-through cuts change that calculus, so treat the rule as a starting point rather than a law.
Hook angle controls how aggressively the tooth leans into the work. Positive hook pulls the blade through the cut, which is fast but grabby. Negative or low hook angle is safer for metal and plastics, where a pulling tooth can catch and kick back.
Kerf width, blade coatings, and arbor size versus RPM are the remaining knobs. Kerf sets how much material the blade removes; coatings reduce friction and pitch buildup; arbor size and RPM must match the saw. When you read blade specifications on a new blade, you are reading those fine-tuning knobs in detail.
Metal is where the two mechanisms collide, and where people buy the wrong tool most often.
Metal Cutting: Where Shearing and Grinding Collide
Metal is where the two cutting mechanisms collide, and where people most often buy the wrong tool. Abrasive wheels and carbide-tipped blades sit on the same shelf for the same job, but they cut nothing alike.
The wheel glowed orange against the angle iron, throwing sparks but barely biting. Ten minutes in, the cut was maybe a third of the way through. I swapped to a carbide-tipped blade, clamped the stock properly, and the rest of the cut took seconds. Grinding versus shearing, in one afternoon.
Abrasive wheels grind through metal as the budget workhorse. They cut slow, wear fast, and throw sparks; you trade time and wheel life for low upfront cost. Carbide-tipped blades shear cleanly and fast, but only with correct RPM, clamping, and feed rate. A positive hook angle pulls aggressively and is riskier in metal, so low or negative hook is the safer default. The choosing a metal-cutting blade guide walks through tooth geometries and safe cutting technique step by step.
Expert Tip: Ask ‘Do I need this cut fast and clean, or just cheap?’ Cheap points to an abrasive wheel; edge quality points to a carbide blade treated like a precision tool.
Safety is non-negotiable: full PPE, spark control, and matching blade or wheel RPM to the tool before the first cut. This isn’t a hierarchy, it’s a trade-off: choose by whether edge quality or cost matters more for the specific cut.
Diamond Blades: Bond, Rim Type, and the Backwards Rule
For hard, brittle materials, the answer is diamond, and the rule that feels backwards. Metal cutting taught you to match hardness with hardness. Diamond blades punish that instinct.
A diamond blade does not cut like a saw. It grinds. The rim is not a row of teeth but a metal matrix, the bond, holding thousands of tiny diamond particles. As you work, the bond wears away at a controlled rate, shedding dull diamonds and exposing fresh, sharp grit underneath. When a diamond blade stops cutting, the bond is almost always the culprit, not dull diamonds.
That is where the backwards rule comes in.
Table 1: Diamond Blade Bond Rule
| Material type | Bond to spec | Why |
|---|---|---|
| Hard, dense (cured concrete, granite, engineered stone) | Soft bond | Dull diamonds must release so fresh grit can cut |
| Abrasive (green concrete, asphalt, brick, block) | Hard bond | The bond must survive the material’s abrasion |
Your instinct says hard material, hard blade. That instinct is the villain. On cured concrete or granite, the material is so hard that diamonds dull quickly. If the bond is also hard, those dull diamonds never release.
A soft bond wears away faster, shedding the dull grit and exposing sharp diamond underneath. Green concrete and asphalt work the other way: the material itself is abrasive and grinds the bond away.
A hard bond resists that wear, so the diamonds stay in place long enough to do their job.
Glazing is what the wrong bond looks like. Run a hard bond on cured concrete or granite and the bond refuses to wear. The diamonds dull, but they stay locked in place. The rim polishes to a shine, the blade stops cutting, glides over the surface, and overheats.
On a car-park resurfacing job one wet November, I watched a labourer fight a hard-bond blade through cured concrete kerbs for most of an afternoon. The rim went mirror-bright and the cut slowed to nothing, but he kept leaning on it, convinced the blade was dull. That polished rim is glazing.
The hard bond refused to wear, so the dull diamonds stayed locked in the rim and the blade just skated over the concrete. I had seen this enough times on enough sites to know the fix before he asked. A softer bond wears faster, which is exactly what that concrete needed, fresh diamond exposed with every pass. I handed him a soft-bond blade the next morning and the same kerbs went through without a fight.
Once the bond is right, rim type decides edge quality and cooling.
Table 2: Diamond Blade Rim Types Compared
| Rim type | Shape | Speed | Edge quality | Typical use |
|---|---|---|---|---|
| Segmented | Gaps between rim segments | Fastest | Coarsest | Dry concrete, brick, block |
| Turbo | Continuous rim with serrated edge | Medium | Medium | General all-rounder |
| Continuous | Solid rim, no gaps | Slowest | Cleanest | Tile, porcelain, natural stone, usually wet |
Segmented rims cut fastest and coarsest. The gaps let the blade cool and clear debris, which is why they dominate dry concrete, brick and block work. Turbo rims sit in the middle, a serrated edge that balances speed and finish. Continuous rims cut slowest and cleanest, which is what tile, porcelain and natural stone demand, and they usually run wet.
Wet versus dry is the heat and dust decision. Dry cutting builds heat fast, so the blade needs free-spin intervals to cool. Wet cutting flushes heat and dust continuously but ties you to a water source and a wet workspace. Choose based on where you are working and what the material will tolerate.
Product Recommendation: Once you know your material and bond, browse the diamond blade range by category: concrete, granite, porcelain. No single universal blade does all three jobs well.
Diamond Drill Bits: Bond and Cooling for Hard, Brittle Materials
The same bond logic applies when you drill instead of cut. A carbide bit skitters across porcelain because it cannot shear what will not yield.
It spins on the glaze, then bites too hard and splits the tile. “Why does every bit I buy just skate across the tile?” a customer asked me at the counter.
That question told me he kept buying carbide for a job it can’t do. Diamond drill bits grind instead, removing material particle by particle.
Choosing a diamond drill bit comes down to the bond. A bond that wears too slowly glazes over; one that wears too fast sheds grit before it cuts. Match the bond to the material hardness.
Cooling is the second variable. Water or lubricant carries heat away from brittle materials that crack under heat shock. Dry drilling porcelain is how you lose a tile.
The map is simple: choose the bit by material, then set technique by cooling.
Expert Tip: Start the hole at a slight angle with low pressure, then straighten up once the bit bites. That stops the skitter that cracks brittle materials.
Grinding and polishing are the same mechanism at different grit scales, and they fail the same way.
Choosing a diamond drill bit covers this in more depth.
Grinding and Polishing: Grit, Bond, and Progression
Drilling hard, brittle materials taught the core rule: you cannot shear what will not yield, so you grind it. Grinding and polishing are the same abrasion mechanism at different grit scales, and they fail the same way. A bond that does not match the material, or a grit you skipped. The tool is rarely the problem.
I glazed a cup wheel on a granite countertop job because I ran a bond meant for soft concrete. The wheel stopped cutting and started burnishing. The face went slick and shiny, the diamond never shed, and the granite just polished under a dead wheel. It cost me half a morning and a wheel I had to dress back to life. The fix was a softer bond that wore at the right rate to expose fresh diamond.
Grinding Wheels
Bond hardness is the first decision when choosing a diamond grinding wheel. Hard granite needs a soft bond: the metal matrix wears fast enough to shed dull diamond and expose fresh grit. Soft concrete needs the opposite. The material barely wears the matrix, so a hard bond holds the diamond longer and stops the wheel from disappearing.
Cup wheel type is the second decision. Single-row for aggressive stock removal, with fewer segments and more pressure per diamond. Double-row gives you control; more segments spread the load and leave a flatter face. Turbo runs fast with less vibration, the segmented rim cutting quicker than a double-row but smoother than a single-row.
Then there is the safety reality. Dry grinding without a shroud and a HEPA vac turns silica into airborne dust. Wet grind granite and marble whenever possible. The water carries the dust down and keeps the wheel cool.
Expert Tip: Dress the wheel the moment it stops cutting and starts polishing. A dressing stick costs a fraction of a new wheel and restores the cutting face in seconds.
A dressing stick is the cheap fix that doubles wheel life. Run it against the spinning wheel for a few seconds and the glazed face opens back up. Most wheels get thrown away while they still have diamond left. They just need the bond dressed back.
Polishing Paste
Polishing paste is the final grit stage, and the grit progression for polishing is where most mirror finishes die. Micron ratings work backwards from grit numbers: a 50-grit diamond is roughly 300 microns, a 3000-grit around 5 microns. The paste carries diamond in a carrier that breaks down under pressure and heat, releasing the grit onto the lap.
Diamond outperforms other abrasives because it stays sharp. Aluminum oxide rounds off. Silicon carbide fractures and dulls. Diamond keeps cutting at the same micron size, which is exactly what a progression demands.
The paste is rarely the culprit. Cross-contamination, skipped grits, and rushed wipe-downs kill a mirror finish far more often than a bad paste.
Expert Tip: Cross-contamination is the silent mirror-killer. A single stray coarse particle on a fine lap will scratch every surface you touch afterward, so clean the workpiece, the lap, and your hands between every grit.
The rule that separates a mirror finish from a cloudy one is halving the micron size at each step. Never skip a grit. Go 100 micron, 50, 25, 12, 6, 3. Each step removes the scratches the last one left. Skip one and the fine grit spends its whole life trying to remove scratches it was never sized to cut. You get a cloudy surface that only shows its micro-scratches under raking light.
The Machine: Power Source and RPM
None of this matters if the machine can’t spin the tool right. The blade you matched to the material is wasted on a saw that turns it at the wrong speed or dies halfway through the job.
Make the machine the last decision. Match power source and RPM to the material and tool, not the other way around.
Last spring I ran a gas saw and a battery saw side by side on the same concrete pour. Cut speed was close enough that neither of us could call a winner by eye. The split showed up a few hours in: the gas saw kept pulling cord after cord while the battery saw was down to its last pack. That afternoon is why I now match the power source to the job.
The five-year cost picture for gas versus electric cut-off saws splits cleanly: gas for all-day outdoor cutting, battery matching mid-size gas cut speed at lower cost, corded when an outlet is within reach.
RPM is the hard rule. A blade rated below the saw’s no-load RPM is a shatter risk. A blade spun too slow cuts poorly and glazes over.
Product Recommendation: The Husqvarna K 770 and Stihl TS 800 are the gas workhorses. The Husqvarna K1 Pace and Hilti DSH 700-22 are the battery and corded standouts. Each is evaluated in the linked gas-versus-electric post, not from spec sheets.
The 5-Question Decision Framework
Now pull it all together into one sequence you can run on any job. Five questions, in order, and the tool decision falls out of the answers.
- What material am I working?
- Is it ductile or brittle, hard or abrasive?
- Should the tool shear or grind?
- Which tool variable matches the material? Tooth geometry for shearing; bond and grit for grinding.
- Does the machine match the tool’s RPM and the job’s power demands?
Run a porcelain tile through it. Porcelain is brittle and hard, so it grinds. That means a continuous rim, wet, diamond blade. And the machine has to be rated for that blade’s RPM before you pull the trigger.
Watch question three closely, because that’s where the tell shows up. The porcelain tile split clean down the middle before the saw finished its pass, and the colleague holding it still blamed his feed rate; the toothed blade he’d fitted was shearing a material that only grinds. The sequence exists so that mismatch gets caught at question three, not after the tile cracks.
You’ll still hit the same four failures. Here’s how to read them.

Common Mistakes and How to Fix Them
Run the five-question framework on paper and you’ll still walk up to jobs already going wrong. The smell of scorched oak. A diamond blade going quiet mid-cut. A tile splitting under the drill. Each symptom traces back to a material-property mismatch rather than a defective tool.
The smell of burning oak is distinctive: sweet and sharp, nothing like normal sawdust. I’ve walked up to enough sites where someone is standing over a smoking circular saw, convinced the blade is dull, when the real problem is a 40-tooth blade on hardwood that needed fewer teeth and a different hook angle. The fix costs nothing, just a blade swap.
But they’ve already scorched a £40 oak worktop and lost the afternoon. The same pattern repeats with diamond blades. A mason runs a hard-bond blade on hard porcelain, the diamonds bury into the bond instead of exposing, the blade goes smooth and quiet, and he buys another instead of letting the old one spin free in air every half-minute to shed heat. One disciplined habit would have saved the blade and the tile.
Every failure below traces to one of the four material properties you already know how to read: hardness, abrasiveness, brittleness, or heat sensitivity.
| Symptom | Real cause | Fix |
|---|---|---|
| Burn marks on wood | Tooth geometry or tooth count mismatched to the material’s hardness and heat sensitivity; too few teeth or too aggressive a hook angle generates heat faster than it clears chips | Switch to a blade with the correct tooth count and hook angle for that wood |
| Tear-out and splintering | Geometry or tooth count mismatch on crosscuts, where the grain exits unsupported and the tooth lifts fibers instead of shearing them clean | Use a higher tooth count or a blade geometry designed for crosscutting |
| Blade glazes and stops cutting | Hard bond on hard material: diamonds bury into the bond instead of exposing, or a grinding wheel surface has loaded and needs dressing | Match a softer bond to the material, or dress the wheel to break open the surface |
| Tile or glass cracks while drilling | Wrong bit type or dry, overheated drilling on brittle materials; heat and vibration build faster than the brittle material can tolerate | Use a diamond core bit with continuous water cooling |
| Abrasive wheel polishes instead of cuts | Wheel surface has glazed over, no fresh abrasive exposed to remove material particle by particle | Dress the wheel to expose new grit, or switch to a coarser grit for the material |
Expert Tip: If a blade or wheel has gone quiet and smooth, stop cutting immediately. Running it longer only generates more heat and overheating is the primary cause of blade failure. Let it spin free in air to shed heat then diagnose the bond or geometry mismatch before making another cut.
Quick answers to the questions everyone asks.
Conclusion
Stop guessing. Before, you blamed technique. Now you read the material’s four properties, pick the mechanism that matches how it fails, and match the tool to that. Which spec actually saved a job? The bond, every time, not the price tag or the fancy coating. Run the 5-Question Framework on your next job before buying another blade, and use the linked guides for the deep dives.
The tool was never the problem. The match was.