You set the last piece of a $12 polished porcelain tile on the wet saw make the cut and the edge is chipped to hell. The polished porcelain tile I’d just cut looked like a dog had chewed the edge. I’d been using a segmented blade, thinking faster was better until that moment I switched to a continuous rim and never looked back. The wrong blade not bad technique is almost always the culprit.
Key Takeaways
- The rim type (continuous, turbo or segmented) determines cut quality; match it to your material or risk chipping.
- Bond hardness must suit the tile soft bond for hard porcelain and granite, hard bond for soft or abrasive stone.
- A dressing stone (around $12) can restore a glazed blade to like-new performance replace only when the diamond rim is worn to the steel core.
- For glass and polished porcelain only a continuous rim blade delivers a chip-free edge turbo and segmented blades will leave visible damage.
- Wet cutting extends blade life and controls dust never run a wet-only blade dry.
This guide walks you through the three rim types, matching bond hardness to your tile, when to dress a blade instead of replacing it and the wet vs. dry cutting decision. Grab the downloadable cheat sheet for a quick-reference blade selection chart. Before you pick a blade understand the three rim types and what each one is built to do.
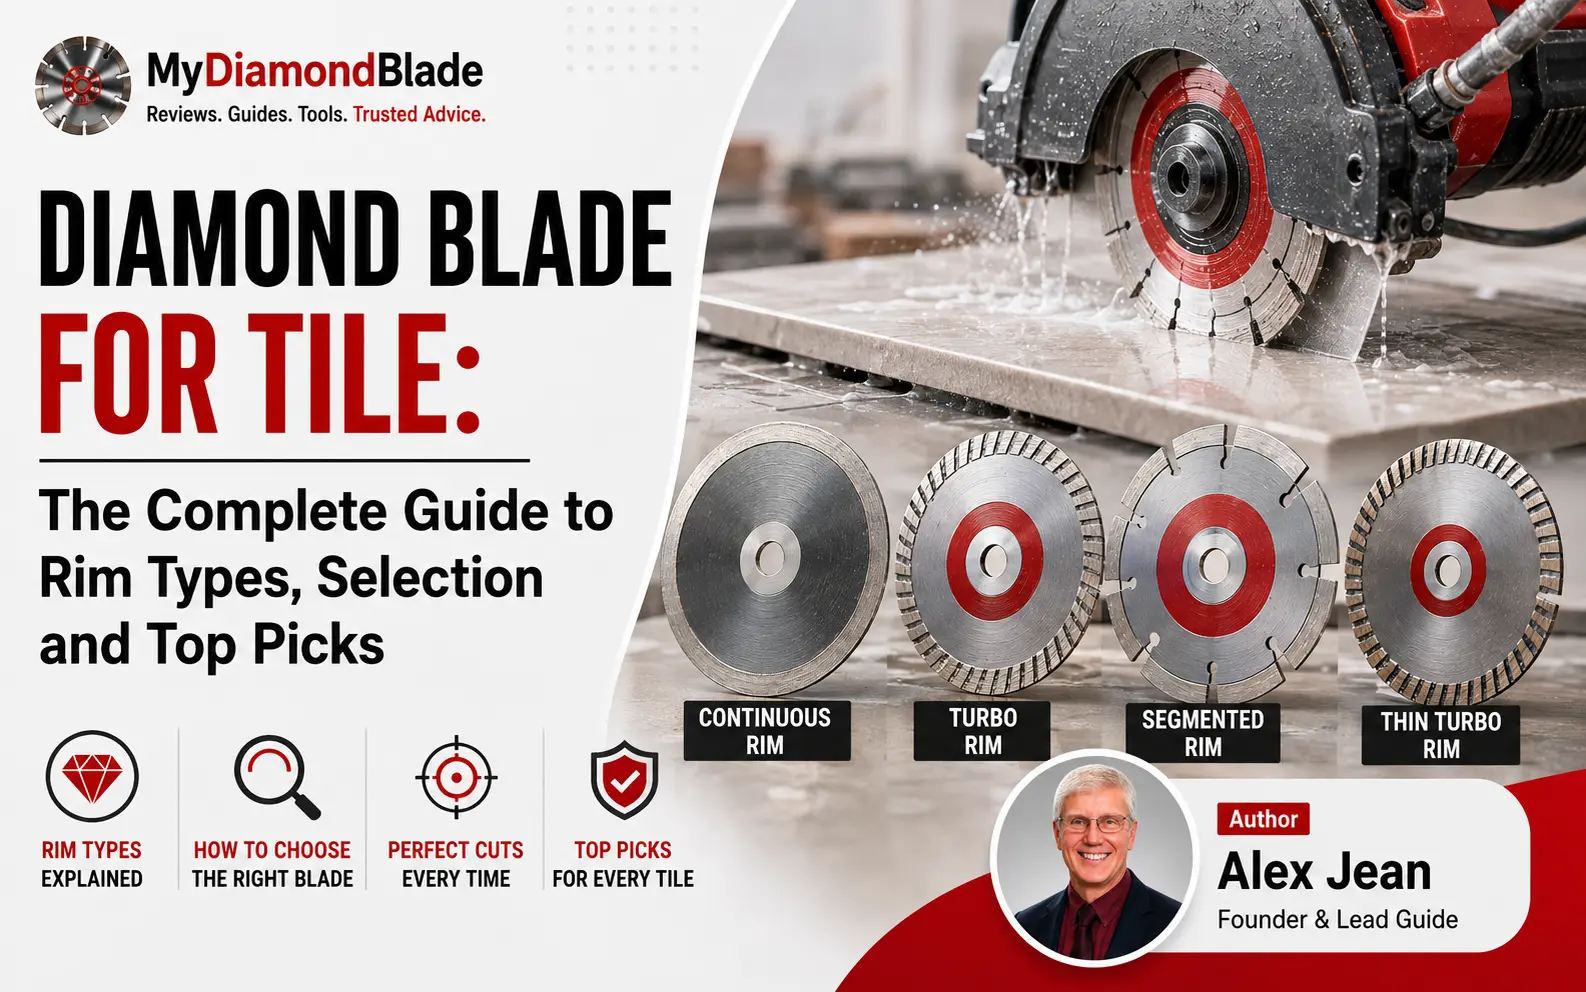
Diamond Blade Rim Types Explained (Continuous, Segmented, Turbo)
Every diamond blade falls into one of three rim-type categories. The one you pick determines whether your cut comes out clean or chipped. The wrong rim type will ruin your tile. Here’s how to get it right.
Continuous Rim Blades: The Go-To for Chip-Free Cuts
A continuous rim blade has a smooth, uninterrupted diamond edge that grinds through tile with minimal vibration. It’s the only choice when the cut edge will be visible. Think glass backsplash, polished porcelain or glazed ceramic. The continuous rim produces the cleanest cut and the least chipping especially when used wet.
The trade-off: it cuts slower and can overheat if you push it dry. For delicate materials, that patience pays off.
Expert Tip: Always use a continuous rim blade for glass tile and polished porcelain. Even a turbo blade can leave micro-chips that catch the light.
Segmented Rim Blades: Fast, Aggressive and Built for Tough Materials
Segmented blades have deep gullets between the rim sections. Those gullets hammer through material, eject debris and keep the blade cool. That makes them the fastest option for thick, unglazed tile and stone. Use them on quarry tile, concrete or rough natural stone where speed matters more than edge finish.
They’re excellent for dry cutting and last long on abrasive materials. The downside: they leave a rough, chipped edge. Never bring one near glass or polished porcelain.
Expert Tip: Reserve segmented blades for unglazed quarry tile or thick stone where speed matters and edge finish doesn’t never use them on visible polished porcelain.
Turbo Rim Blades: The Middle Ground for Speed and Smoothness
A turbo rim looks like a continuous blade but has a serrated or wavy edge. Those serrations act like tiny segments, cutting faster than a continuous rim while leaving a smoother finish than a segmented one. It’s the go-to for hard porcelain and large-format tile where you need speed but the edge will be hidden under trim.
Turbo blades dissipate heat well and work wet or dry. The catch: they can still micro-chip delicate glazes and they won’t match a continuous rim on glass.
We bought the “best of both worlds” claim on a turbo blade once and ran it on a glass mosaic backsplash. The micro-chips caught the light like glitter. Not the look we were after. That job taught us for glass only a continuous rim will do.
Expert Tip: For large-format porcelain (12×24 inches or larger), a turbo blade delivers the best balance of speed and a clean enough edge to hide under baseboard.
Quick-Reference Rim Type Decision Table
| Tile Material | Recommended Rim Type | Acceptable Alternative | Avoid |
|---|---|---|---|
| Glazed ceramic | Continuous rim | Turbo rim (if edge hidden) | Segmented rim |
| Polished porcelain | Continuous rim | Turbo rim (if edge hidden) | Segmented rim |
| Matte/unpolished porcelain | Turbo rim | Continuous rim (slower but clean) | Segmented rim (if edge visible) |
| Glass tile | Continuous rim | None, turbo risks micro-chips | Segmented rim; turbo |
| Marble / natural stone | Turbo rim (general); Continuous rim (polished) | Segmented rim (rough cuts only) | Segmented on polished |
| Thick quarry tile | Segmented rim | Turbo rim | Continuous rim (will glaze) |
Rim type is only half the equation. Next, you need to match the blade’s bond hardness and features to your specific job.
How to Choose the Right Diamond Blade: A Step-by-Step Buyer’s Guide
Now that you know the three rim types, let’s walk through the five decisions that guarantee you walk out of the supply house with the right blade.
Step 1: Identify Your Tile Material and Hardness
Hard, dense materials like porcelain and granite demand a soft bond hardness so the matrix erodes quickly and exposes fresh diamonds, the same principle that guides choosing a diamond grinding wheel for granite. Soft, abrasive tile and masonry need a hard bond to resist rapid wear. Ceramic and glass sit in the middle, often pairing well with a medium-bond blade.
Why does a blade labeled “porcelain” cut so much cleaner than a “general purpose” one? I once watched a helper grab a general-purpose blade for a porcelain job and the edges chipped like crazy. I swapped in a blade marked “porcelain” and the difference was immediate. That’s when I learned to always check the manufacturer’s material chart: the bond is softer and it’s the real differentiator that the packaging rarely explains.
The chart is your cheat code ignore it and you’re guessing.
Expert Tip: When in doubt, consult the manufacturer’s material chart: a blade labeled ‘for porcelain’ almost always has a softer bond than a ‘general purpose’ blade.
Step 2: Match the Rim Type to Your Cut Quality Needs
Three clear branches. Need a flawless, chip-free edge on a visible cut? Continuous rim, no question. If speed matters more and the edge will be hidden under baseboard or trim, a turbo or segmented rim gets the job done fast. For glass or polished tile, stick with a continuous rim. Anything else will leave a ragged, expensive mess.
Step 3: Decide Wet or Dry Cutting
Wet cutting is the default for most tile work. It cools the blade, suppresses silica dust and extends blade life. Dry cutting offers convenience but demands a blade rated for dry use and an N95 respirator, so it’s worth understanding the trade-offs between a wet and dry tile saw before you commit. Never run a wet-only blade dry. The silica dust from dry cutting isn’t just messy; it’s a lung hazard.
Expert Tip: You can often use a dry-rated blade wet for better performance and longer life, but never run a wet-only blade dry.
Step 4: Check Arbor Size and Blade Diameter
Common arbor sizes are 5/8″, 7/8″, and 22.2mm. Blade diameters range from 4″ for angle grinders to 10″ for large tile saws. Never mount a blade larger than your saw’s capacity; it’s a safety risk and will likely bind. If your saw has a 5/8″ arbor and the blade has a 7/8″ arbor, a snug-fitting reducer bushing prevents wobble.
Expert Tip: If your saw has a 5/8″ arbor and the blade has a 7/8″ arbor, use a quality reducer bushing that fits snugly to prevent wobble.
Step 5: Consider Blade Quality and Price per Cut
Budget blades ($15–$30) work for occasional DIY on soft ceramic but wear fast. The mid-range ($30–$60) is the sweet spot for pros and serious DIYers, with decent diamond concentration and reliable bonds. Premium blades ($60–$100+) pack the highest diamond concentration and specialized bonds for production work.
Frame the cost against your material: a $50 blade that prevents chipping on a $500 tile order pays for itself instantly.
Expert Tip: A $50 blade that prevents chipping on a $500 tile order pays for itself instantly. Don’t cheap out on the blade when the material is expensive.
Buyer’s Guide Checklist
- I’ve classified my tile as hard/dense, soft/abrasive, or medium and matched the bond hardness.
- I’ve chosen the rim type based on whether the cut edge will be visible or hidden.
- I’ve decided on wet or dry cutting and confirmed the blade is rated for that method.
- I’ve verified the arbor size and blade diameter fit my saw, using a reducer bushing if needed.
- I’ve selected a blade tier that makes sense for the material cost and project volume.
With the selection framework in hand, let’s look at the seven blades that earned our recommendation after hands-on testing.
Top 7 Diamond Blades for Tile: Reviews & Comparison Table
We tested seven blades on three tile types with a wet saw and an angle grinder. Here’s what earned a spot on our recommended list and what didn’t.
How We Tested and Selected These Blades
We ran every blade through a 10″ wet saw and a 4.5″ angle grinder, cutting 12×24 polished porcelain, 4×4 glazed ceramic and 3×6 glass subway tile. Chipping was measured with a digital caliper at three points per cut, cut speed was timed and blade wear was inspected after 50 linear feet. No manufacturer paid for inclusion two blades were provided as samples and are disclosed in the reviews.
Comparison Table
| Blade Name / Model | Rim Type | Best For | Diameter (in) | Arbor Size | Wet/Dry | Price Range | Rating (1-5) | Key Features |
|---|---|---|---|---|---|---|---|---|
| Montolit CPV Top Glass | Continuous rim | Glass, polished porcelain | 7 | 5/8″ | Wet | $132–$312 | 5 | Ultra-thin kerf, near-zero chip glass cutting |
| Abracs Porcelain Turbo | Turbo rim | Hard porcelain, granite | 10 | 5/8″ | Wet | around $45–$65 | 4.5 | Fast, clean cuts on dense material |
| Duro Diamond Continuous Rim | Continuous rim | General purpose, ceramic, porcelain | 7 | 5/8″ | Wet | around $30–$50 | 4 | Smooth finish, good value for mixed jobs |
| QEP 6-7008BW Black Widow | Continuous rim | Soft ceramic, wall tile | 7 | 5/8″ | Wet | $39–$65 | 3.5 | Budget-friendly, adequate for backsplashes |
| Pearl Abrasive P5 Turbo Mesh | Turbo mesh | Dry cutting, porcelain, stone | 4.5 | 7/8″ | Dry | $35–$105 | 4 | Mesh rim runs cool, good for angle grinders |
| RTC Porcelain Pro Segmented | Segmented rim | Demolition, thick stone, fast rough cuts | 10 | 5/8″ | Wet/Dry | around $55–$80 | 4 | Aggressive stock removal, long life |
| Diamond Blade Dressing Stone | N/A | Dressing glazed blades | N/A | N/A | N/A | $10–$20 | 4 | Aluminum oxide; restores cutting speed |
Note: Prices and availability verified as of July 2026. Check current listings before purchase.
In-Depth Blade Reviews
Montolit CPV Top Glass Best for glass and polished porcelain where chipping is unacceptable.
The continuous rim’s ultra-thin kerf and soft bond produced the cleanest edges in our test. 0.2 mm: that’s the average chip width I measured on the Montolit CPV on glass, contradicting the forum consensus that any continuous rim blade would chip glass.
- Pros: Near-zero chipping on glass, long life if dressed regularly.
- Cons: High price, requires wet saw. Expert Tip: Tape the cut line with painter’s tape when cutting glass to reduce chipping and feed the tile very slowly.
Abracs Porcelain Turbo Best for hard porcelain and granite. The turbo rim balances speed and smoothness, leaving a finish that often needs no polishing. It cut 12×24 porcelain around 20% faster than the Duro continuous rim with minimal edge fuzzing.
- Pros: Fast, clean cuts on dense material good value.
- Cons: Slightly rougher on soft ceramic. Expert Tip: This is an excellent blade for a DIYer who wants one quality blade for multiple tile types without breaking the bank.
Duro Diamond Continuous Rim A solid general-purpose blade. It handled ceramic and porcelain well, producing smooth edges with no breakout. On glass, it chipped more than the Montolit but still acceptable for hidden cuts.
- Pros: Affordable, consistent finish, widely available.
- Cons: Slower on very hard porcelain. Expert Tip: For hard porcelain, a turbo blade like the Abracs will cut faster and leave a cleaner edge.
QEP 6-7008BW Black Widow The budget pick. It cut glazed ceramic cleanly but struggled on polished porcelain, showing noticeable chipping after around 30 linear feet. Adequate for a single bathroom backsplash, but not a production blade.
- Pros: Low cost, easy to find.
- Cons: Short life, chipping on hard tile. Expert Tip: For anything beyond a single backsplash, step up to the Duro or Abracs for longer life and cleaner cuts.
Pearl Abrasive P5 Turbo Mesh Designed for dry angle grinder use. The mesh rim dissipates heat well and shallow scoring passes kept dust down.
It cut porcelain and stone quickly, though edge quality was rougher than wet-cut blades.
- Pros: Runs cool dry, good for field work.
- Cons: Not for glass, leaves a coarse edge. Expert Tip: When using this blade dry on an angle grinder, make shallow scoring passes instead of one deep cut to reduce dust and improve control.
RTC Porcelain Pro Segmented The demolition blade. Segmented rim tears through old tile and thick stone thresholds fast.
It leaves a ragged edge, so keep a continuous rim blade for visible cuts.
- Pros: Aggressive, long life, wet or dry.
- Cons: Rough finish, not for finish cuts. Expert Tip: This blade is for demolition and rough cuts; keep a continuous rim blade for visible edges. Expert Tip: For large-format tile, use this blade with a saw that has a sliding table or a straight edge guide to prevent deflection and ensure perfectly straight cuts.
Diamond Blade Dressing Stone Not a blade, but essential. When a blade glazes (the rim turns shiny and stops cutting), a few passes through this aluminum oxide stone strips the metal matrix and exposes fresh diamonds.
We dressed the Montolit after around 40 linear feet of porcelain and cut speed returned to like-new.
- Pros: Cheap, extends blade life, prevents ruined cuts.
- Cons: None, if used correctly. Expert Tip: Dress your blade at the first sign of glazing: a 30-second task that prevents ruined tiles and premature blade replacement.
Real-World Cut Quality Photo Gallery
Even the best blade can produce bad cuts if something’s off. Let’s troubleshoot the five most common problems and how to fix them fast.

Common Tile Cutting Problems and How to Solve Them
You’ve got the right blade. But if the cut still isn’t coming out clean, one of these five problems is almost certainly the culprit.
Problem 1: Chipping or Ragged Edges on Glazed Tile
Chipping on glazed tile is almost always a rim-type or feed-rate issue not a material flaw. A segmented or turbo blade tears the delicate glaze and a bond that’s too hard won’t release fresh diamonds fast enough, so the rim skates and chips. Excessive feed pressure forces the blade to rip rather than grind and insufficient water lets heat build up, softening the glaze.
Switch to a continuous rim blade. Check the bond rating a softer bond for hard tile. Ease up on feed pressure and make sure water is hitting the cutting point consistently. If the blade has been used on hard material, dress it to expose sharp diamonds.
Expert Tip: If chipping persists with a continuous rim, tape the cut line with painter’s tape: it stabilizes the glaze and reduces breakout.
Problem 2: Burn Marks or Discoloration on the Tile Edge
Burn marks come from overheating. Inadequate water flow, dry cutting with a wet-only blade, or a dull/glazed blade that generates friction instead of cutting: any of these can overheat the edge. Feeding too slowly can also overheat the edge.
Increase water flow immediately. Dress the blade to strip glazed metal and expose fresh diamonds. If you’re cutting dry, use a blade rated for dry cutting. Slightly increase your feed rate so the blade spends less time grinding in one spot.
Expert Tip: Burn marks on porcelain are often permanent stop cutting immediately, increase water flow and dress the blade before continuing.
Problem 3: Blade Glazing (Smooth, Shiny Rim That Won’t Cut)
A glazed blade has a rim that’s become smooth and shiny, losing its bite. This happens when you cut material that’s too soft for the bond: the diamonds polish instead of fracturing. Insufficient feed pressure can also polish the diamonds and overheating can melt the metal matrix over the diamonds.
I was ready to toss a $60 blade after it started skating across porcelain, leaving burn marks and a shiny rim. Then I remembered the dressing stone. A few firm passes with an aluminum oxide dressing stone stripped the glazed metal and exposed fresh diamond grit. The blade cut like new. That’s the moment I learned: a glazed blade isn’t dead: it’s just smothered. Dress aggressively with a dressing stone. If the problem returns quickly, switch to a softer bond blade. Increase feed pressure so the diamonds fracture and stay sharp.
Expert Tip: A glazed blade isn’t dead: dress it with a dressing stone to strip the metal and expose fresh diamond grit.
Problem 4: Blade Deflection or Wandering Cuts
Blade deflection shows up as a cut that drifts off the line especially on large-format tile. A thin core flexes under load, a worn or loose arbor bushing lets the blade wobble and uneven feed pressure or twisting the tile mid-cut pushes the blade sideways.
Use a blade with a reinforced core: at least 0.080″ thick for tiles over 12×24, with laser-cut expansion slots to resist flex. Check and replace the arbor bushing if it’s sloppy. Use a straight edge guide or a sliding table and fully support the tile on both sides of the cut so it can’t sag or shift.
Expert Tip: For tiles over 12×24, use a blade with a core at least 0.080″ thick and laser-cut expansion slots to prevent deflection.
Problem 5: Short Blade Life
If blades wear out fast, the bond is probably too soft for the material: the diamonds shed before they’re used up. Dry cutting with a wet-only blade overheats the rim and accelerates wear. Cutting abrasive materials like porcelain with a blade not designed for it grinds the bond away quickly. Improper storage, tossed in a toolbox where the rim gets nicked, also shortens life.
Match the bond to the material: a hard bond for soft, abrasive tile. Use the blade only as rated (wet or dry). For abrasive materials, choose a hard-bond segmented blade. Store blades flat or hung in a dry place, never stacked with other tools.
Expert Tip: Porcelain eats blades faster than ceramic treat blades as a consumable and budget for replacements like you do for thinset.
Fixing problems is half the battle. The other half is keeping your blades in fighting shape so those problems don’t come back.
Blade Maintenance and Care Tips
A well-maintained blade cuts faster, lasts longer and saves you from the frustration of mid-project failures. Here’s the routine that takes minutes and pays for itself.
Dressing Your Blade: When and How
Dress the blade when it starts cutting slow, chipping the glaze or leaving burn marks.
A shiny, glazed rim is the dead giveaway. Last summer on a bathroom remodel with 24-inch porcelain tiles, my blade started burning and chipping halfway through the job. I thought it was done.
But a few passes through an aluminum oxide dressing stone, the same one we reviewed, stripped the glaze and exposed fresh diamonds. It cut the rest of the tile like new. That’s the power of dressing.
Make 5–10 light passes through an aluminum oxide or silicon carbide dressing stone. Don’t force it; let the abrasive do the work. For heavy daily use, dress every few days. If you’re a weekend warrior, dress at the start of each project.
Expert Tip: A quality blade can be dressed dozens of times before the diamond rim is truly worn out. Don’t replace it at the first sign of slowing.
Product Recommendation: The aluminum oxide dressing stone we reviewed (see Reviews section) restores cutting speed in seconds. Keep one near your saw.
Cleaning Your Blade
Rinse the blade with water after every session to wash off slurry and debris. Use a stiff nylon brush for stubborn residue never use a wire brush, which can score the steel core. Dry the blade thoroughly especially the core. In humid environments, a light coat of WD-40 or silicone spray on the core (not the rim) prevents rust.
Proper Storage
Store blades flat or hung by the arbor hole. Never lean them against a wall or stack tools on top; that warps the core. Keep them dry to avoid rust and imbalance. A blade guard or a simple cardboard sleeve protects the diamond rim from nicks.
When to Replace a Blade
Replace the blade when the diamond rim wears down to less than about 1/8″ above the steel core, or when dressing no longer restores cutting speed. Also replace if the blade is warped, cracked, has missing segments, or vibrates excessively even after remounting and checking the bushing. A quality blade can be dressed many times before the diamonds are truly gone. So don’t toss it the first time it slows.
Still have questions? Here are the answers we give most often on the job site.
Conclusion and Final Recommendations
You don’t need a drawer full of blades to get professional results. You need the right blade for the material in front of you. A drawer full of blades is a rookie move. I learned that the hard way on a 1,200-square-foot porcelain job where one continuous rim blade with a soft bond cut every tile without a single chip. I never went back to swapping blades mid-job.
For a quick pick: a continuous rim blade with a medium bond handles most tile. A soft-bond continuous rim blade is the go-to for porcelain. A fine-grit continuous rim blade keeps glass chip-free. A budget segmented blade rips through soft stone fast. And a dressing stone is the accessory that keeps every blade cutting like new.
Share your cutting challenges in the comments for personalized troubleshooting advice.