Mid-cut on a dense porcelain tile, the rim glazed and the saw bogged; I switched from buying by brand to matching the bond to the material and stopped paying for blades that died young.
That stall is where most people learn the hard way: a diamond blade is a system, and treating it like a commodity is what kills it.
Key Takeaways
- A diamond blade grinds, not cuts. The bond must match the material’s abrasiveness.
- Hard materials need soft bonds; soft abrasive materials need hard bonds. Get it backwards and the blade glazes or wears fast.
- Rim type sets speed-versus-finish: segmented fast and rough, continuous chip-free, turbo balanced.
- Judge blades by cost per cut, not sticker price. A matched blade can outlast a dearer one on the wrong material.
- Most “worn out” blades are just glazed and rescuable; most “blade problems” are machine setup problems.
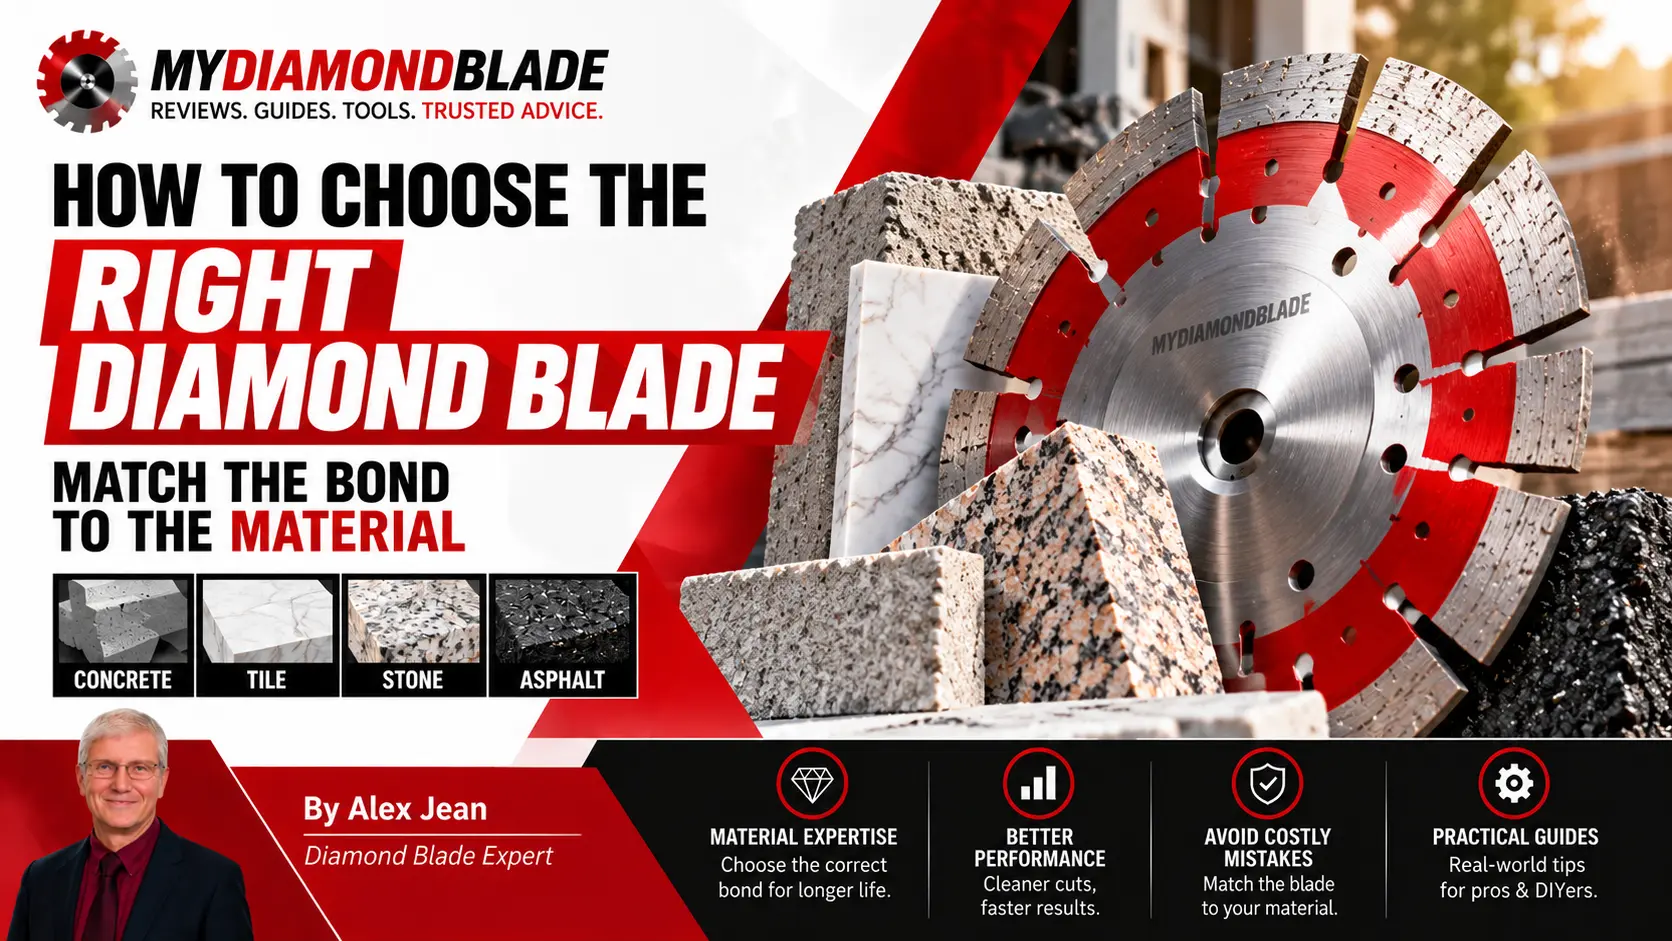
Most buyers pick by brand or price and never look at the material. That’s the whole problem, and it’s why blades die young and cuts stall. This guide gives you the complete system: the one rule, the three rim types, the material matches, the cost economics, the symptom-based troubleshooting, the dressing rescue, and the UK safety rules. You will leave able to choose the right blade first time and rescue the ones you already own.
Before any of the rules make sense, you need to understand what a diamond blade actually does to the material, so start with the grinding principle.
How a Diamond Blade Actually Works
The whole system hangs on one mechanical fact most buyers never learn: a diamond blade grinds material into powder rather than slicing it like a knife. The rim is a metal band called the bond matrix, packed with diamond grit, and every pass wears that bond away just enough to expose fresh, sharp diamonds underneath.
That’s the self-sharpening cycle. As the bond wears, dull diamonds pop out and new ones take over. The blade stays sharp because it constantly sheds its own surface, and how a diamond blade grinds is closer to a grinding wheel than a saw.
Think of it as the cookie principle. The bond is the dough, the diamonds are the chocolate chips. You want the dough to wear away just fast enough to keep fresh chips exposed at the surface. Wear too slow and the dough smooths over the chips: a glazed rim, and the blade stops cutting and starts polishing. Wear too fast and the chips fall out before they’ve done their work: the blade sheds diamonds and dies young.
A glazed blade looks identical to a dull one, and that’s the trap. I watched a neighbour fight a concrete slab for twenty minutes with a blade that had stopped cutting, leaning his whole weight on the saw and building nothing but heat. The bond had smoothed over the diamonds.
The blade wasn’t worn out; it was suffocating under its own metal. Ten seconds of dressing the edge would have exposed fresh grit and put him back to work, but he’d been sold the blade as self-sharpening and took that to mean it never needed a hand. It sharpens itself only if the bond wears at the right rate. When it doesn’t, you have to help it.
Expert Tip: If a blade stops cutting and starts polishing, it has glazed. Don’t push harder, dress the edge or check the bond instead.
Once you see the blade as a self-sharpening grinder, the one rule that drives every choice becomes obvious.
The One Rule: Match the Bond to the Material
The cookie-dough picture, bond as dough and diamonds as chips, turns into the one rule for matching the blade to the material. Hard, dense material needs a soft bond so the bond wears and exposes fresh diamonds. Soft, abrasive material needs a hard bond so the bond holds the diamonds longer.
Get it backwards and you get one of two failures. A bond that is too hard glazes: the metal smooths over the diamonds and the blade polishes instead of cutting. A bond that is too soft wears fast and sheds segments.
Why does one concrete blade cut flint aggregate fine and glaze on limestone? Because the label ‘concrete’ hides two opposite choices. Flint and quartz aggregate is hard, so it needs a soft bond. Limestone aggregate is soft and abrasive, so it needs a hard bond. I have watched this catch out tilers and builders on the same site, same saw, same blade, different slab.
The chart below is the anchor for every decision on this page. Selection, diagnosis, and maintenance all trace back to matching the bond to the material.
| Material | Abrasiveness / Hardness | Bond Needed | Rim Type | Wet or Dry |
|---|---|---|---|---|
| Cured concrete hard aggregate (flint, quartz) | Hard, dense | Soft bond | Segmented | Dry |
| Cured concrete soft aggregate (limestone) | Soft, abrasive | Hard bond | Segmented | Dry |
| Green (fresh) concrete | Soft, abrasive | Hard bond | Segmented | Dry |
| Asphalt | Soft, abrasive | Hard bond | Segmented | Dry |
| Brick block pavers | Soft, abrasive | Hard bond | Segmented | Dry |
| Granite (6-7 Mohs) | Hard, dense | Soft bond | Turbo | Wet |
| Marble, limestone | Soft, abrasive | Hard bond | Continuous | Wet |
| Porcelain tile | Hard, dense | Soft bond | Continuous | Wet |
| Ceramic tile | Soft, abrasive | Hard bond | Continuous | Wet |
| Reinforced concrete (rebar) | Hard concrete, steel | Soft bond | Segmented | Wet |
Bond is only half the decision. The rim type sets the speed-versus-finish trade-off you also need to get right.
The Three Rim Types, and What “All Purpose” Really Means
With the bond matched, the rim type decides how fast you cut and how clean the edge comes out. Three profiles cover nearly every job, and each one trades speed against finish.
Segmented rims cut fastest because the gullets between segments clear debris and let air cool the rim. That speed comes at a price: the edge it leaves is rough. For fast, rough cuts in concrete and masonry, segmented is the default.
Six or seven on the Mohs scale is where I stopped pretending a segmented blade would do, after enough granite jobs to know better: one wet pass with a continuous rim left an edge clean enough to skip the polishing pad.
Turbo rims sit between the two. The serrated edge cuts faster than a continuous rim but leaves a cleaner edge than segmented. It’s the middle ground when you need decent speed without tearing the material.
Continuous rims cut slowest but leave the cleanest edge. Tile and stone work reaches for them because chipping is the enemy, and a continuous rim gives the blade nowhere to catch and snap the material.
The trade-offs between segmented, turbo and continuous rim blades are worth understanding before you buy, because the wrong rim will fight you on every cut.
| Rim Type | How It Cuts | Best For | Finish Quality | Speed | Typical Wet / Dry Use |
|---|---|---|---|---|---|
| Segmented | Gullets clear debris and cool the rim | Fast, rough cuts in concrete and masonry | Rough | Fastest | Dry |
| Turbo | Serrated edge balances speed and finish | General masonry and stone where a cleaner edge matters | Medium | Medium | Wet or dry |
| Continuous Rim | Uninterrupted edge prevents chipping | Tile and stone where chipping is the enemy | Cleanest | Slowest | Wet |
The all purpose blade is a deliberate compromise. It cuts common masonry and tile adequately but excels at none. The bond and rim are tuned to be acceptable across materials, which means they’re never ideal for any single one.
Most buying guides skip that part.
When is the compromise worth it? Mixed jobs, one blade on the van, a day that swings between brick and block and the odd tile. If you’re not sure what the next job throws at you, an all purpose blade keeps you cutting without swapping rims.
The compromise becomes a false economy the moment the job demands precision. Precision tile work, hard granite, long concrete runs: there the right rim type pays for itself in finish quality and blade life. Choose an all purpose blade for a granite worktop and you get a rougher edge, more dressing, and a blade that wears out faster than a continuous rim would. The money saved on the sticker price disappears into rework and replacement.
Now put bond and rim together and walk the materials one by one, because each one has a right answer and a common mistake.
Material by Material: What to Reach For
Here is the field guide. The material in front of you decides the blade, not the brand on the shelf.
Cured Concrete
Identify the aggregate before anything else. Flint and quartz aggregate is hard, so reach for a soft bond that sheds diamonds fast enough to keep fresh grit cutting. Limestone aggregate is soft and abrasive, so flip to a hard bond that holds its diamonds against the constant grinding. Segmented rim either way, and cut wet when the saw allows it.
A blade I’d grabbed for a garden patio glazed halfway through the first slab and started spitting brown dust instead of cutting. The supplier had labelled it “concrete general purpose,” which meant a hard bond, fine for limestone aggregate but useless on the flint mix I was actually cutting.
The bond sealed over the diamonds before I’d finished the second pass. I dressed the rim with an abrasive stone, switched to a soft-bond segmented blade, and the same slab cut clean in under a minute. That was the day I stopped trusting the word “concrete” on a blade label.
Expert Tip: On cured concrete, identify the aggregate first: flint and quartz need a soft bond, limestone needs a hard bond. The same ‘concrete’ label hides two opposite blade choices.
For a specific pour, the process of choosing a concrete blade starts with the aggregate, not the label.
The common mistake: trusting the word “concrete” on the packaging. You glaze on flint or strip on limestone, and either way you blame the blade when the match was wrong from the start.
Green Concrete
Green concrete hasn’t fully cured, so it’s softer and more abrasive than the same mix will be at 28 days. That abrasiveness points to a hard bond.
A segmented rim handles the gummy slurry better than a continuous rim, and cutting wet keeps the fine silica dust down. The common mistake: using your cured-concrete blade, likely a soft bond for hard flint aggregate, on green concrete.
The soft bond strips out on the abrasive green mix, and you burn through a blade in a single afternoon.
Asphalt
Asphalt is soft, abrasive, and heat-sensitive. A medium-hard bond resists the constant abrasion without going so hard that the asphalt can’t wear the matrix. Segmented rim, to clear the sticky swarf.
Dry cutting is standard on asphalt, but keep the blade moving: dwelling in one spot softens the asphalt further and loads the rim. The common mistake: running a hard-bond blade, the kind designed for limestone concrete, on asphalt.
In summer heat the asphalt is too soft to abrade the bond fast enough, the diamonds stay buried, and the blade glazes.
Brick and Block
Brick and block are abrasive rather than hard, but they grind the bond constantly. A hard bond holds up to that abrasion. Segmented rim to clear the dusty swarf. Dry cutting is fine, though a light water feed extends blade life considerably. The common mistake: running a continuous rim on abrasive brick. The narrow gap can’t clear the dust fast enough, the rim loads up, and the blade overheats before you’ve finished the course.
Natural Stone
Split this into three. Granite is the hard one: 6 to 7 on the Mohs scale, dense and unforgiving. Reach for a soft to medium-soft bond with a continuous rim or turbo, and cut wet. The water keeps the blade cool and flushes the slurry, which matters more here than anywhere else because granite heat-checks the rim fast.
Marble and limestone are softer and less dense. A medium to hard bond holds the diamonds longer against the softer abrasive grain. A continuous rim gives the clean finish you want on visible stonework, and cutting wet is standard for both dust control and edge quality.
The common mistake: treating all natural stone as the same material. A soft-bond granite blade on marble strips out in a few cuts. A hard-bond marble blade on granite glazes before you finish the first pass.
Porcelain and Ceramic Tile
Porcelain is dense and hard, harder than most natural stone you’ll cut. A soft bond exposes fresh diamonds fast enough to keep up, and a continuous rim gives the chip-free finish that matters on visible tile. Cut wet on a tile saw. The common mistake: too much pressure or the wrong rim, which chips the edge. Porcelain doesn’t forgive a heavy hand. Let the blade do the work at its own pace.
Ceramic is softer and more forgiving. A medium bond is plenty, continuous rim, and wet cutting is still the right call for finish quality. The same chipping risk applies, but ceramic tolerates a bit more pressure than porcelain.
Reinforced Concrete
Rebar changes the blade requirement completely. You’re cutting steel as well as concrete, and steel is harder than any aggregate. A soft bond handles the hard steel, and a segmented rim with deep segments gives the clearance you need when the blade hits rebar.
Cut wet, both for dust and to cool the segments after the steel generates heat. The common mistake: running a standard concrete blade into rebar.
The bond isn’t built for steel, the segments overheat, and you can chip a segment clean off the core. Cutting reinforced concrete demands a blade rated for steel as well as concrete.
Knowing the right answer per material is one thing. Running a repeatable five-step system on every job is what stops the guessing for good.
The Selection System: Five Steps, No Guessing
Everything on this page collapses into five steps you can run on any job, in any merchant’s aisle. The step-by-step selection system covers material identification, the Mohs hardness scale, and the field tests in more depth, but the version that fits in your head runs in under a minute.
Step 1: Identify the material. Name what you’re actually cutting. Cured concrete, green concrete, asphalt, brick, porcelain, granite. Each sits somewhere on the hardness spectrum, and the spectrum is the whole game.
Step 2: Field-test the hardness. Scratch the material with a known reference or check it against the Mohs scale. Granite sits at 6-7, hard and dense, and that number decides everything downstream.
On the Cotswold kitchen refit last November, I watched a sub-contractor fight a granite worktop with a blade he’d bought for limestone. Twenty minutes in, the rim had glazed to a mirror shine and the saw was bogging on every pass. He blamed the blade. The blade was doing exactly what a hard bond does on hard stone, holding the diamonds too long. The parameter that clicked for me was the Mohs number itself. 6-7 is the instruction to reach for a soft to medium-soft bond, and he’d skipped the test that would have told him that.
The opposite failure is just as common: a soft bond on soft abrasive material sheds diamonds in minutes. Both mistakes come from skipping the field test.
Step 3: Match the bond. Apply the one rule to the hardness you just tested. No exceptions, no brand loyalty, no “it worked on the last job.”
Step 4: Choose the rim for the finish. Segmented, turbo, or continuous, as covered in the rim types section. The finish you need decides the rim, not the material’s hardness.
Step 5: Confirm the machine specs. Arbor size, RPM rating, wet or dry capability. A blade that’s right for the material and wrong for the arbor is a blade you can’t fit. A blade rated below the saw’s RPM is a blade you shouldn’t fit.
Three trades, same five steps, three different outcomes:
A porcelain tiler reads porcelain as hard and dense, tests it against the Mohs scale, matches a soft bond, picks a continuous rim for the clean edge, and confirms the tile saw’s arbor and RPM before buying.
A concrete patio cutter reads cured concrete as hard, matches a soft bond, picks a segmented rim for speed through the slab, and checks the cut-off saw’s wet kit.
A granite fabricator reads granite at 6-7 Mohs, matches a soft to medium-soft bond, picks a continuous rim or turbo, and cuts wet. Same system, three different blades.
Run the system right and the blade lasts, which is where the real money conversation starts.
The Economics: Cost Per Cut, Not Sticker Price
The sticker price is a lie. Here is the arithmetic that proves it.
| Blade | Upfront Price | Cuts Before Failure | Cost Per Cut |
|---|---|---|---|
| Abrasive cut-off wheel | £2.70 | 1 full-depth cut | £2.70 |
| Cheap segmented, wrong bond | £15 | 6 cuts | £2.50 |
| Matched segmented, correct bond | £30 | 80 cuts | £0.38 |
| Premium segmented, correct bond, wet cut | £60 | 200 cuts | £0.30 |
“Laser-welded segments, top of the range,” the counter bloke said, tapping the £100 blade; the weld never mattered, because a £30 matched blade outlasted that £100 one on the wrong material every time.
A cheap blade that glazes in twenty minutes costs far more per cut than a dearer blade that lasts all day. Divide the upfront price by realistic cuts before failure, never by the seller’s claimed lifespan.
An abrasive wheel runs roughly £2.70 per full-depth cut; a diamond blade lands somewhere around £0.28 to £0.47. Six to ten times cheaper per cut. That gap is why diamond versus steel blades is not even a contest on cost per cut.
The table figures are illustrative field estimates, not guarantees: real cuts depend on material, depth, and operator. Even a correctly matched blade will eventually misbehave, and the fix is usually diagnosis, not a new blade.
Troubleshooting by Symptom, Not by Replacing the Blade
The cost-per-cut math only holds if you stop killing blades that aren’t dead. When a cut goes wrong, the instinct is to blame the blade. Usually the blade is the last thing that failed.
I learned this the hard way on a Cardiff bathroom refit. The blade kept wandering off the line on commercial porcelain, so I binned it and bought a replacement. Same wandering, same drift. Then I took the flange off and found a hairline crack I’d missed, letting the blade shift a fraction under load.
A cheap flange fixed what I’d blamed on a good blade. That job cost me a £45 blade and half a day’s downtime, all because I diagnosed the symptom as “blade is done” instead of checking the machine first. Now the saw gets inspected before the blade gets blamed.
The flange, the arbor bore, the spindle, the RPM, those are the first four things I check when a cut goes wrong, in that order.
Most of what gets called a blade problem traces back to machine setup: arbor fit, flange condition, RPM mismatch, or spindle runout. The blade is just the part that shows the symptom. Diagnosing blade problems by symptom before reaching for the wallet is the single habit that separates trades who buy three blades a year from those who buy thirty.
Vibration and wandering are arbor and spindle problems, not blade wear. Uneven segment wear means the blade isn’t sitting square on the flange, or the flange faces are dirty or mismatched. A glazed rim means the bond is wrong for the material or the RPM is off. It doesn’t mean the blade is finished.
Here is the symptom table I work through on site. It covers the six problems you’ll actually see, what each one really means, and what to do about it.
| Symptom | Likely Cause | Fix |
|---|---|---|
| Blade glazes, stops cutting, shiny rim | Bond too hard for the material, or wrong RPM | Dress the blade to expose fresh diamonds; verify RPM matches the blade rating |
| Blade wears down fast, segments shrink | Bond too soft for the material | Switch to a harder bond blade matched to the work |
| Vibration, excessive noise | Arbor fit issue, spindle runout, or worn flanges | Check arbor bore matches the saw, inspect flanges for cracks or wear, measure spindle runout |
| Uneven segment wear | Flange mismatch or debris trapped between flange and blade | Clean both flange faces, ensure flanges match in size, reseat the blade square |
| Cut wanders | Spindle runout or blade not seated square on the arbor | Inspect spindle for play, check blade seating, replace worn arbor or flanges |
| Chipped tile edges | Wrong rim type for the material, or blade speed too high for the tile | Use a continuous rim blade for ceramic and porcelain, confirm RPM suits the material |
Expert Tip: Before you blame the blade, spin the saw with no blade mounted and listen. A whining, grinding spindle tells you everything. The blade was never the problem.
The table saves money, but it also saves the blade itself in one specific case. A glazed rim is the most common symptom in the table, and it’s the one people misread as a dead blade most often. The bond smoothed over the diamonds, the blade stopped cutting, and the rim went shiny. That blade still has diamonds in it. They just need exposing again.
One symptom deserves its own rescue procedure, because it’s the most common and the most fixable: the glazed rim.
Dressing: How to Rescue a Glazed Blade
Before you bin a blade that has stopped cutting, check the rim. Chances are it’s glazed, not finished. The bond has smoothed over the diamonds, so the blade stops cutting even though plenty of grit remains. Most “worn out” blades are just glazed.
The whine gave it away before I even looked. A porcelain job, third bathroom of the week, and the blade had gone from a wet grind to a smooth, high-pitched squeal that meant the diamonds weren’t touching the tile anymore. I killed the saw, ran a thumb over the rim, and it felt like polished glass. The bond had glazed over.
I grabbed the 60-grit dressing stone, set the water running steady, and made three short passes. In under a minute the blade was chewing through the next cut like it was new. That stone cost me a few quid and it has rescued more blades than I can count. The marketing never mentions it because they’d rather sell you a new blade.
The fix is dressing a glazed blade: abrading the bond to expose fresh diamonds. For wet tile and stone saws, a 60-grit diamond dressing stone is the standard. Steady water flow, short controlled cuts.
| Method | What It Does | Best For | Cost | Notes |
|---|---|---|---|---|
| Dressing stone (60-grit) | Abrades the bond to expose fresh diamonds | Wet tile and stone saws | Low | Steady water, short controlled cuts |
| Cutting abrasive material (asphalt, cinder block) | Wears the bond back through friction | Slower, less controlled alternative | Free if material is on hand | Less predictable; watch the rim |
| Silicon carbide block | Abrades the bond | Bench dressing or touch-ups | Low | Similar to dressing stone, less aggressive |
| Replace the blade | New diamonds, new bond | When the rim is truly worn past the diamonds | Highest | Only when dressing fails or the rim is gone |
Safety first: eye protection, secure the blade, and never dress a blade on a running saw without proper guarding.
Prevent glazing with a simple routine: match the bond to the material, keep water flow steady, and dress at the first sign of a slowing cut.
Expert Tip: Keep a simple log of cuts per blade so you spot the cut-rate drop early and dress the rim before it glazes hard mid-job.
Rescue the blade, but don’t forget the dust it throws. The UK rules on silica are the part you cannot skip.
Safety and Silica: The UK Rules You Cannot Ignore
Every cut throws dust, and some of that dust ends careers. Here is what the law says and what actually keeps you safe.
Cut concrete, brick, tile or engineered stone and you release respirable crystalline silica. That silica dust has no safe level of exposure. The UK/EU workplace limit is 0.1 mg/m³ over an 8-hour shift, which sounds technical until you realise a visible dust cloud has already blown past it. Treat any cloud you can see as over the line.
The HSE inspector wrote the improvement notice before the dust had even settled: the lad on the next bench was dry-cutting a quartz worktop, and the visible cloud told the whole story, no monitor needed.
The law moved in 2026. The HSE has declared dry cutting of engineered stone unacceptable, published COSHH guidance on 11 May, and run over 1,000 inspections of stone fabricators and construction sites across Great Britain in the 12 months that followed. Dry cutting other materials is only acceptable with proper extraction and RPE.
Apply the COSHH hierarchy in order, top to bottom:
- Eliminate or substitute: spec a material or method that produces less dust, or none.
- Engineer: water suppression or HEPA extraction at the tool.
- Administrate: limit exposure time, rotate tasks, keep others out of the area.
- PPE: RPE as the last line, never the first.
Wet cutting is the default for tile and hard materials. Dry cutting is the exception.
Those are the rules and the system. Here are the questions everyone asks once they have read this far.
Conclusion
Here is the whole system in one breath.
You used to buy by brand and price, then pay for the guess in glazed rims and lost time. Now you hold one rule: match the bond to the material. Rim type follows the cut. Cost per cut, not sticker price, is the only honest measure.
A glazed rim means dress, not replace. Dressing a glazed rim costs five minutes and a block. Replacing it costs real money. On a patio job last summer, a blade glazed halfway through and I reached for the dressing stone instead of the van keys.
The cheapest cut is the one you rescue. Bogging means wrong bond. Silica compliance is non-negotiable.
Next time you face a wall of blades: identify the material first, match the bond, pick the rim, check the machine, cut wet.
Bookmark this page. Start with the material in front of you.