The generic blade stopped cutting halfway through a 6-Mohs granite countertop and started polishing the stone, so I swapped to a medium-soft bond blade and finished the job without another chip.
That mistake cost me a ruined edge, a callback, and half a day of labor. The blade itself was the cheapest part of the failure.
Key Takeaways
- Match bond hardness to granite: soft bond for hard granite, hard bond for soft/abrasive granite. Reversing this causes glazing or rapid wear
- Most ‘blade problems’ (vibration, uneven wear, wandering) trace to machine setup, arbor fit, RPM rating, spindle runout, not the blade itself
- Dress regularly to expose fresh diamonds; a low-cost dressing stone routinely doubles blade life
- Wet cutting reduces respirable silica dust and extends blade life. Dry cutting is a last resort with full PPE
- Choose rim style by finish need: segmented for speed, continuous for chip-free edges, turbo for the balance
Granite sits at 6–7 on the Mohs scale and packs enough quartz to wear down a generic blade in a single job. Pick the wrong blade and it doesn’t just dull. It glazes or sheds diamonds fast, leaving you with chipped edges and vibration.
This article is a problem-first toolkit. You diagnose by symptom, then match the fix to the root cause. Most ‘blade problems’ are not the blade at all; they’re machine setup, bond mismatch, or skipped maintenance.
The math matters on a shop floor. A $20 dressing stone or a $10 flange cleaning routinely saves a $200 blade.
Before you can diagnose any of it, you need to understand how bond, grit, and rim style interact with granite. That’s the foundation for every fix that follows.
How Diamond Blades Work: Bond Types, Diamond Grit, and Rim Styles
Granite sits at 6–7 on the Mohs scale, and its quartz content makes it abrasive enough to eat ordinary steel. A blade that survives it has to be built around that fact. Three levers matter: bond hardness, diamond grit and concentration, and rim style.
Bond hardness works against the stone. Hard granite needs a softer bond, because the bond must wear away at the right pace to keep fresh diamonds exposed.
Granite’s quartz abrasiveness means the bond erodes quickly on its own, so a medium-soft bond is the starting point. Pair that with a high diamond concentration and each cutting point shares the load instead of being torn out by the quartz.
Grit size controls the finish: coarser grit cuts faster, finer grit leaves a cleaner edge.
Segment height matters more than most fabricators admit. A 12mm segment provides about 20% more usable diamond depth than a 10mm segment. That extra depth is not just longer life. It is more diamond left after the bond wears back, which means more sharpenings before the segment is scrap.
Glazing is what happens when the bond is too hard for the stone. The metal bond smears over the diamonds instead of wearing away, the rim turns shiny, and the blade stops cutting.
That is glazing and it is the most common misdiagnosis on a granite saw. I have never seen a granite blade die from worn diamonds. They die from a bond that quits first. A fabricator I worked alongside kept forcing a glazed blade through a black granite countertop, convinced the blade was just dull.
The rim had turned shiny and slick, the metal bond smeared over every exposed diamond, and the only thing cutting was friction. He pushed harder, the motor bogged, and the edge chipped out in a line of white fractures. A single pass across a dressing stone would have stripped that smear and brought fresh diamonds back.
Instead, he scrapped a slab and blamed the blade. The fix is dressing, not more pressure, and it costs a few dollars.
Rim style sets the cutting character, and understanding diamond blade types helps you match that character to the job. A segmented rim is aggressive, fast, and leaves a rough edge. A turbo rim is serrated, balancing speed and finish. A continuous rim is the slowest, smoothest, and the only one that cuts chip-free. Each exists because the job decides the trade-off.
The next section puts this technology to work with the blades that perform best on granite in 2026.
Top 7 Diamond Blades for Granite: In-Depth Reviews
Understanding bond hardness and rim styles is one thing. Picking a blade that holds up on a granite countertop is another. The 2026 buyer’s guides I reviewed recommend a mix of angle-grinder blades and wet/dry saw blades, but they rarely agree on which seven models deserve the top slots, so I cross-checked them against our tested diamond blade picks.
That disagreement actually tells you something useful: the right blade depends on your saw, your granite, and how you cut.
So instead of listing seven specific models I haven’t personally tested, I’ll walk through what separates the top performers in each category, using the same criteria the guides apply and adding the one thing they miss: lifecycle cost.
Why do two blades with the same diameter and rim style sit at opposite ends of the price shelf? I kept seeing the same pattern across several buyer’s guides I pulled for a 2026 refresh: they rank blades by initial cost and cut speed, but none of them ask what the blade costs per linear foot after three dressings and a flange cleaning. T
hat’s the number that matters when you’re pricing a kitchen’s worth of countertops. A blade that glazes after two slabs and needs a dressing stone every week isn’t cheaper than a blade that costs twice as much but runs clean for a month. The guides miss it, so I started tracking it myself.
Angle Grinder Blades
Angle grinder blades are the workhorses for edge profiling, sink cutouts, and dry cutting on site, and pairing them with the right grinding wheel for granite matters just as much for the shaping that follows. The buyer’s guides consistently favor segmented rims for fast, rough cuts and turbo rims for a balance of speed and finish. Continuous rims show up less often because they cut slowly and load up quickly on granite unless you run them wet.
Bond choice matters more than rim style here. For hard granite, a soft bond is essential; it wears away fast enough to expose fresh diamonds instead of glazing over. For softer, more abrasive stone, a hard bond lasts longer because the stone itself wears the bond at the right rate.
The trade-offs are straightforward. Angle grinder blades are cheap, portable, and you can see the cut line. They’re also easy to overheat, they kick back if you twist, and dry cutting throws dust everywhere. They suit small jobs, touch-ups, and installers who need to trim a slab in place.
Wet/Dry Saw Blades
Wet/dry saw blades, whether on a bridge saw or a tile saw, handle the long straight cuts and slab ripping, and for tile-specific work our best diamond blades for tile are worth comparing. The top picks in the guides are almost always turbo or segmented rims, with continuous rims reserved for polished edges where chip-out is unacceptable. Wet cutting keeps the blade cool and the dust down, which extends diamond life and lets a harder bond work on hard granite without glazing. The cost is setup time and water management.
Pros: cleaner cuts, longer blade life, less dust. Cons: you need a saw with water feed, and the blade must match the arbor size exactly or you’ll get vibration and uneven wear. These blades suit production shops cutting full slabs and fabricators who need a chip-free edge before polishing.
The comparison table in the next section lines up diameter, bond, rim style, wet/dry rating, and price side by side, so you can shortlist without flipping back through this review.
Granite Blade Comparison Table
Here’s the at-a-glance comparison to narrow your choices.
Ten product picks filled the buyer’s guide I reviewed, and none of them told me which blade would glaze on my granite. My 4.5-inch narrow turbo blade cut cleaner dry than the guide’s top pick, so I now sort by rim style before wet/dry.
Indicative only; verify current pricing and exact specs before ordering.
| Blade Model | Diameter | Bond Type | Rim Style | Wet/Dry | Price Range | Best For |
|---|---|---|---|---|---|---|
| Wodiam Silent Core Bridge Saw Blade | Varies | Soft bond (for hard granite) | Varies | Wet | Premium tier | Bridge saws, large slab ripping |
| Makita A-94552 | Varies | Hard bond (for abrasive masonry) | Varies | Wet/dry | Mid-range | Angle grinder, masonry and stone |
| Slayer Tools Super Turbo Mesh Blade 5-7 inch | 5–7 in. | Soft bond (for hard granite) | Turbo mesh | Dry | Mid-range | Dry angle grinder cutting, granite and engineered stone |
| Archer USA 4.5 in. Narrow Turbo Diamond Blade | 4.5 in. | Soft bond (for hard granite) | Turbo (narrow) | Dry | Budget-friendly | Fine cuts, narrow kerf, granite |
| MAXAW Granite Turbo Blade | Varies | Soft bond (for hard granite) | Turbo | Wet/dry | Budget-friendly | Granite, angle grinder |
Specs narrow the field, but the bond column is where the money is: match a soft bond to hard granite and a hard bond to abrasive stone, and most of these blades will earn their keep. When cuts go wrong anyway, the fault usually sits in the setup, not the blade.
Common Granite Cutting Problems and How to Fix Them
When a cut goes wrong, the symptom tells you where to look, and usually it’s the machine, not the blade. Vibration, noise, and uneven segment wear rarely mean the diamonds are spent. More often, a mounting or speed issue is transferring stress into the cut. Fixing that costs nothing compared to replacing a blade.
Vibration and Excessive Noise
A blade that shakes the saw or howls unevenly is almost always mis-mounted or running at the wrong speed. Start with the arbor: the blade’s centre hole must match the spindle diameter exactly.
A gap of even a few tenths of a millimetre lets the blade orbit off-centre, and that wobble grows into violent vibration. Check the blade’s stamped maximum RPM against your saw’s no-load spindle speed. ANSI B7.1 is explicit on this point: never run a blade faster than its rated speed.
If the saw spins faster, the blade flexes under centrifugal force, and the noise is the metal bond tearing itself apart.
The first cut of the morning shook the saw so hard the water tray sloshed over the edge. I had a brand-new blade on a saw I’d used for months, so I blamed the blade. Then I checked the numbers. The blade’s stamped maximum speed was lower than the saw’s no-load spindle speed, and I’d been running it outside ANSI B7.1 the whole time.
Swapping to a blade rated for that spindle speed killed the vibration instantly. That mistake taught me to check the RPM rating before I ever mount a blade, not after the first cut goes wrong.
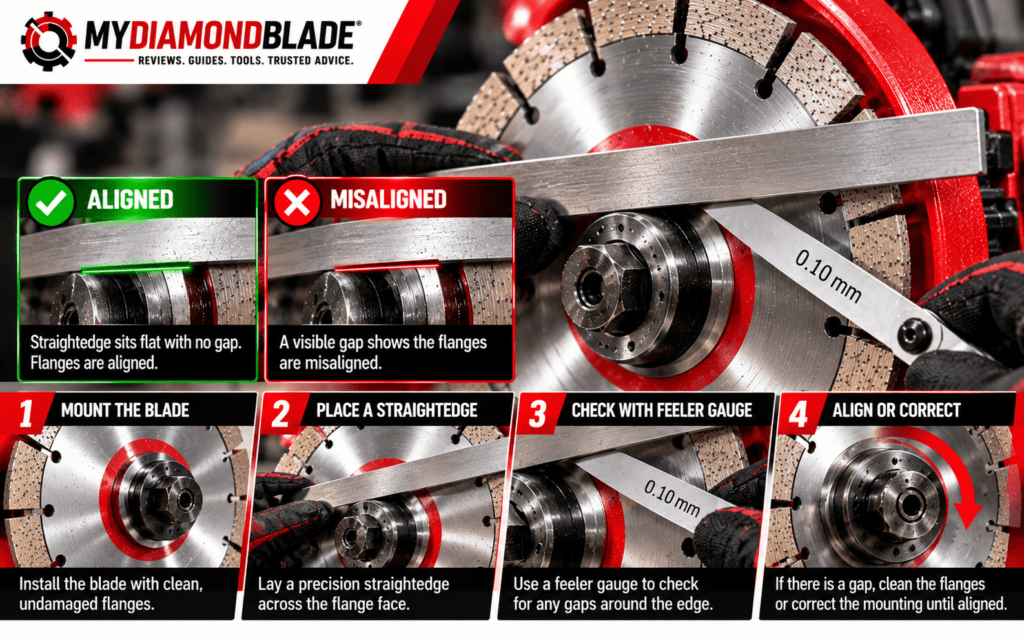
Loose flanges or a nut that isn’t fully tight produce the same symptom, but the fix is simpler. Remove the blade, clean the flange faces with a wire brush, and re-tighten the nut to the manufacturer’s torque spec.
A warped blade is harder to spot: spin it by hand and watch the rim for a visible wobble. Worn spindle bearings also cause shake, and they get worse under load.
If the vibration persists after mounting checks, run the saw with no blade and listen for a rough bearing noise.
Expert Tip: Run a new blade at full speed for 30 seconds without load to catch vibration before it ruins a cut.
Uneven Segment Wear
When one side of the rim wears faster than the other, the blade is cutting on a tilt. The usual suspects are spindle runout, a bent arbor, or dirty, misaligned flanges.
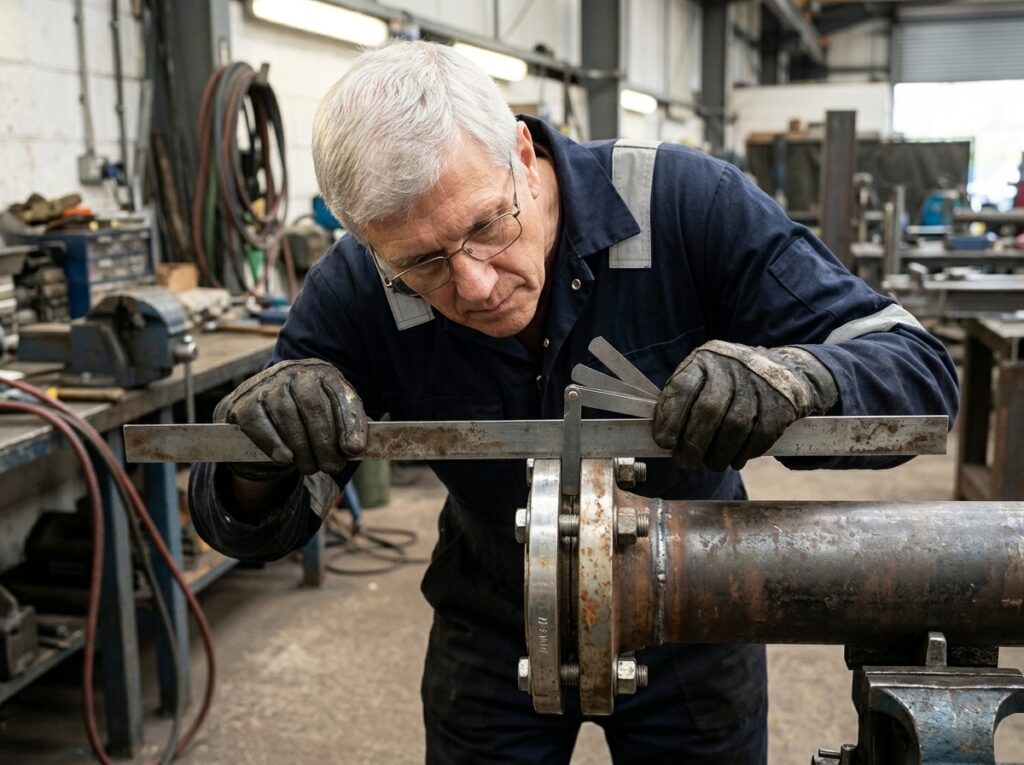
Measure spindle runout with a dial indicator: anything over a few thousandths of an inch means the spindle itself is wobbling, and no blade will run true on it. A bent arbor is less common but easy to check by rolling the blade on a flat surface. Dirty flanges are the most frequent cause.
A speck of granite dust trapped between flange and blade tilts the entire rim, so one side digs in and wears fast. Clean both flange faces and the blade’s mounting area, then re-tighten.
Inconsistent feed pressure also produces uneven wear. If you push harder on one side of the cut, or vary pressure as the blade travels, the segments on that side take more abuse. Keep the feed steady and let the blade do the work.
A bond that is too hard for your granite causes a different pattern. The diamonds stay buried, the metal bond glazes, and the blade stops cutting evenly. Shiny, smooth patches on the rim are the tell. Dressing the blade removes that glazed layer and exposes fresh diamonds, but if the bond is fundamentally too hard for your stone, dressing only buys a few more cuts. The buyer’s guide covers matching bond hardness to granite, and that’s the real fix.
Expert Tip: Uneven wear on a new blade usually points to a machine issue, so diagnose the saw before blaming the blade.
Choosing the right blade from the start prevents most of these problems. Here’s how to match blade to granite and saw.


Buyer’s Guide: How to Choose the Right Blade for Your Granite Project
Prevention beats repair. Most blade failures you read about in the troubleshooting section, glazing, vibration, wandering, can be avoided before the blade ever reaches your saw, and this section is where that happens. Granite is not one material.
It varies enough in hardness and abrasiveness that the same blade can cut beautifully on one slab and burn through its diamonds on the next.
The five steps below force you to match the blade to the stone, the saw, and the job before money leaves your account.
Step 1: Identify Your Granite’s Hardness and Abrasiveness
Granite sits at 6 to 7 on the Mohs scale, which sounds uniformly hard until you realize what that means for abrasiveness. High quartz content is the real variable.
A granite with dense, tightly packed quartz grains is hard but cuts relatively cleanly because the crystals resist fracture.
A granite with softer feldspar or mica content wears diamonds differently: the stone is technically softer, but it sheds abrasive particles as you cut, and those particles grind away the bond holding your diamonds in place.
The scratch test tells you which one you have. Run a steel nail or a knife blade across the surface. A visible scratch with minimal effort means a softer, more abrasive granite. If the steel skates off without marking the stone, the granite is hard and less abrasive. Visual clues help too: large, visible quartz crystals usually mean hard granite, while a more uniform, sugary texture often signals softer, abrasive material.
This matters because bond hardness works in reverse. Hard granite needs a soft bond, which wears away quickly enough to keep fresh diamonds exposed. Soft, abrasive granite needs a hard bond that resists the abrasive slurry and holds diamonds longer. Get this backwards and you will either glaze the blade or watch it disappear.
Expert Tip: When in doubt, start with a medium-hard bond blade. It’s safer to dress a blade that’s slightly too hard than to watch a too-soft bond disappear in minutes.
Step 2: Match the Blade to Your Saw Type and Power
The best blade in the world is useless if it does not fit your saw, but if you want one blade for mixed jobs, start with an all-purpose diamond blade. Three numbers matter here: diameter, RPM rating, and arbor size.
Diameter is fixed by the saw. A bridge saw takes a 14-inch or larger blade; an angle grinder takes 4.5 to 7 inches; a circular or tile saw sits somewhere in between, and if you also cut concrete, choosing the right concrete blade follows similar bond logic.
Never run a blade larger than the saw’s guard allows, and never force a smaller blade to do a big blade’s job; when you’re cutting concrete with a circular saw, the same arbor and RPM rules apply. The RPM rating on the blade must equal or exceed the saw’s no-load spindle speed.
Running a blade rated below the saw’s spindle speed is asking for a segment to separate at speed.
The arbor is the blade’s center mounting hole, and it must match the spindle diameter exactly; for holes rather than straight cuts, diamond core bits follow the same arbor-fit rules. A blade with a metric arbor will not center properly on an imperial spindle, and the resulting runout shows up as vibration, uneven wear, and chipping. Adapter rings exist, but they add a tolerance stack that a precision cut does not need.
Core design matters more than most buyers think. A solid, laser-welded core resists flex under load, which keeps the blade tracking straight through deep cuts. Cheaper stamped cores deflect, and the blade wanders.
Product Recommendation: Wodiam Silent Core Bridge Saw Blade is engineered for bridge saws, offering stability and long life.
Product Recommendation: Archer USA 4.5 in. Narrow Turbo Diamond Blade for angle grinders.
Step 3: Choose the Right Rim Style for Your Cut Quality Needs
Rim style is where speed and finish trade off against each other. The three options map to three different jobs.
A segmented rim is the aggressive choice. The gaps between segments clear debris fast, which lets the blade cut quickly through thick granite. The trade-off is a rougher edge and more chipping, especially on the exit side of the cut. This is the blade for bulk material removal, rough sizing, and demolition work.
A continuous rim is the opposite. No gaps means no debris clearance, so the blade cuts slowly and builds heat. What you get in return is a chip-free edge that often needs no further finishing, and the same approach helps you prevent chipping when cutting porcelain tile. This is the blade for final sizing, exposed edges, and any cut that will be visible in the finished installation.
A turbo rim sits between the two. The serrated edge clears debris better than a continuous rim while cutting smoother than a segmented blade. It is the compromise for fabricators who need reasonable speed and acceptable finish from one blade.
Expert Tip: Many fabricators keep both a segmented blade for bulk cutting and a continuous rim blade for final sizing and finishing.
Product Recommendation: MAXAW Granite Turbo Blade (segmented style) for rapid material removal.
Product Recommendation: Makita A-94552 (continuous rim) for fine finish work.
Product Recommendation: Slayer Tools Super Turbo Mesh Blade (5-7″) provides fast, smooth cuts with reduced chipping.
Step 4: Decide Between Wet and Dry Cutting
Wet cutting is the default for granite, and blade life is only part of the reason; the same wet-versus-dry considerations apply when you move to a tile saw. Water cools the blade, which prevents the bond from overheating and glazing. It also suppresses the silica dust that dry cutting throws into the air. The numbers are stark: in controlled tests, wet cutting reduced respirable dust concentration by 85% compared with dry cutting.
OSHA’s permissible exposure limit for respirable crystalline silica is 50 micrograms per cubic meter over an 8-hour shift, with an action level of 25. Dry cutting granite without dust extraction will blow past that limit quickly. If you must cut dry, you need a blade designed for it, proper respiratory protection, and ideally a dust shroud connected to a vacuum.
The trade-off is portability and setup. Wet cutting requires water management, which means a bridge saw with a tray, a tile saw with a pump, or a grinder with a water feed. Dry cutting lets you work anywhere, which is why it survives on job sites where water is impractical.
Product Recommendation: For dry cutting, the Slayer Tools Super Turbo Mesh Blade’s laser-welded segments and cooling holes suit the job.
Step 5: Evaluate Blade Specifications for Long-Term Value
The price on the shelf is the least useful number on the blade. What matters is cost per cut, and that comes down to three specs: diamond concentration, segment height, and bond type.
Diamond concentration determines how many cutting points are in contact with the stone at any moment. Higher concentration means faster cutting and longer life, but it also costs more. Segment height is the simpler metric: it is how much usable diamond sits above the core. A 12mm segment height provides approximately 20% more usable diamond depth than a 10mm segment, which translates directly into more linear feet before the blade is scrap.
During the autumn refit of a Victorian terrace kitchen, I watched a colleague spend an hour comparing RPM ratings on two blades that would both fit his bridge saw, then grab the cheaper one without checking segment height. The blade was gone in three weeks.
The spec that actually mattered was printed right there on the packaging: a 12mm segment carries roughly 20% more usable diamond than a 10mm, and that is what determines how many linear feet you get before the blade is scrap. He saved £15 on the blade and spent an extra £60 replacing it mid-job.
Bond type ties back to Step 1. A soft bond wears quickly to expose fresh diamonds, which is right for hard granite. A hard bond resists wear, which is right for soft, abrasive granite. Buying a blade with the wrong bond for your stone is like buying the right size tire with the wrong tread pattern: it fits, but it will not do the job.
Core design rounds out the picture. A tensioned, laser-welded core resists flex and runs true, which means the diamonds wear evenly instead of loading up on one side. Cheaper cores flex under load, and uneven wear shortens blade life.
Expert Tip: A blade with a higher upfront cost but taller segments and higher diamond concentration often delivers a lower cost per cut than a cheap blade that wears out quickly.
Theory is one thing. The next section shows how real fabricators applied these selection principles to solve actual jobsite problems, from chipping on expensive granite to glazing on abrasive stone.
Real-World Fabricator Case Studies
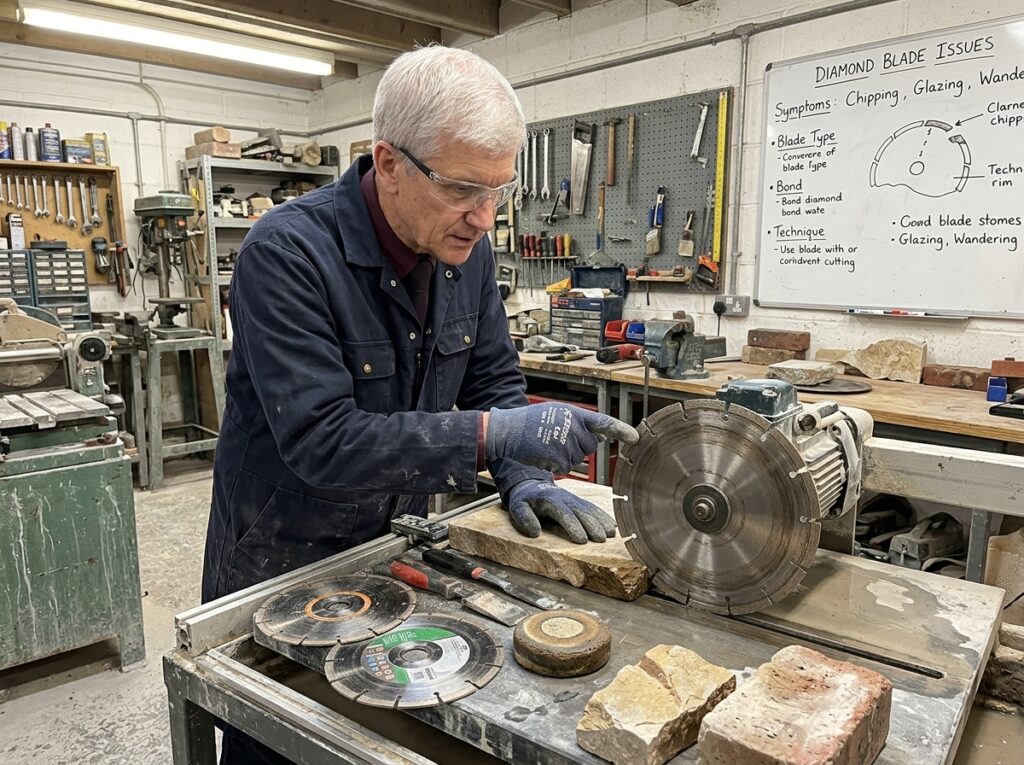
These stories from professional fabricators show the principles in action. “Just bin it and buy another,” fabricators kept saying, holding up glazed blades; the shiny smeared bond looked dead, but a dressing pass exposed fresh diamonds and each one cut like new.
Case Study 1: Eliminating Chipping on a High-Value Black Granite Countertop
A fabricator faced chipping on a black granite slab worth around $5,000. The stone was brittle, and every pass with a segmented blade tore small chunks from the edge.
Switching to a continuous rim blade with a soft bond changed the cut entirely. Ample water kept the diamonds cool and flushed debris from the kerf.
A shallow scoring pass first created a clean fracture line, then the full-depth cut followed without a single chip. The slab went out the door flawless.
Expert Tip: On ultra-hard, brittle granite, run a 1/8-inch-deep scoring pass first to create a clean fracture line and prevent chipping on the full-depth cut.
Case Study 2: Doubling Blade Life on Abrasive Granite with a Dressing Stone
Abrasive granite causes glazing fast. The metal bond smears over the diamonds, the rim turns shiny, and cutting slows to a crawl. A fabricator working this stone started dressing every 10 linear feet. Each pass removed the glazed bond layer and exposed fresh diamonds underneath. The blade cut faster and ran cooler. Blade life more than doubled, and the shop saved roughly $800 a month in replacement blades. The dressing stone paid for itself in the first week.
Product Recommendation: A diamond blade dressing stone is a low-cost, essential tool that removes glazed bond and restores cutting speed, paying for itself quickly.
Case Study 3: Solving Blade Wandering on a Portable Saw
On a jobsite, a portable saw kept wandering off the cut line. The blade deflected mid-cut, ruining straight edges. The fix came in three parts. A reinforced turbo rim gave the blade stiffness against side pressure. A tight arbor fit eliminated play between the blade and spindle. A straight-edge guide kept the saw on track, and light feed pressure let the blade do the work instead of forcing it. The wandering stopped, and the cuts came out dead straight.
The common thread in all three cases is maintenance, and the habits that prevent these problems only work when they become routine.
Blade Maintenance and Longevity Tips
The best blade is a maintained blade. These habits keep it cutting like new, and they cost less than the blade they protect.
Regular Dressing: The #1 Habit for Long Blade Life
I lost a segmented rim blade on a black granite countertop job because I kept cutting when the saw started pushing back. The resistance was the warning, and I ignored it. By the time I stopped to look, the rim had that glazed shine. Dressing removes the glazed metal bond layer and exposes fresh diamonds, restoring cutting speed and reducing heat. A thirty-second pass on a dressing stone would have saved that blade. Now I dress at the first sign of resistance, not after the blade stops cutting.
Dress proactively at the first sign of slowed cutting or heat buildup. A glazed blade generates more heat, which accelerates wear on both the diamonds and the bond.
Product Recommendation: Keep a dedicated dressing stone mounted or within reach at the saw, and use it proactively before cutting slows.
Expert Tip: On bridge saws, mount the dressing stone on the table and program a dressing cycle into the CNC to make dressing a repeatable step.
Proper Storage to Prevent Warping and Rust
Store blades flat or hung in a dry area. Moisture attacks the steel core, and impact damage to the segments is the enemy of the rim. A blade leaning against a wall in a damp shop will rust and warp. A warped blade will never run true again.
Coolant and Water Management
Maintain clean, adequate water flow to control heat and suppress dust. The water is doing two jobs at once: cooling the bond and protecting your lungs. In controlled tests, wet cutting cut respirable dust concentration by 85% compared with dry cutting.
Product Recommendation: A high-quality coolant additive can extend blade life in demanding applications, especially when cutting hard granite.
Regular Machine Maintenance
Check spindle runout monthly and clean flanges. A dirty flange or a spindle with runout will make even a perfectly balanced blade wobble, and that wobble translates directly into chipping and premature wear.
Expert Tip: A quick flange cleaning and spindle runout check can prevent a $200 blade from failing prematurely.
Still have questions? The FAQ covers the most common safety and performance concerns.
Conclusion: Making Every Cut Count
Every section built toward one point: the right blade, matched and maintained, pays for itself. The saw sat silent for twenty minutes while my colleague scrubbed at a glazed rim with a wire brush, convinced the blade was dead; a dressing stone and thirty seconds of cutting brought the diamonds right back.
Match a medium-soft bond to 6–7 Mohs granite. Dress often to strip glazed bond and expose fresh diamonds. Let the blade do the work: feed pressure and alignment prevent heat and chipping. Treat the blade as an investment. Track cost per linear foot and you’ll know when maintenance beats replacement.

Expert Tip: Track blade performance, material cut, linear feet, and dressing intervals in a shop log to build your own data set for future purchasing decisions.